[my_shortcode]
A project requires a some method for monetisation for the user for him to cover the costs. Monetisation can come in the form of in-app purchases, ads or premium content. Handling payments can be difficult, but thankfully, this is where payment gateways step forward with solution. A payment gateway is a merchant service provided by a service provider that authorises credit card or direct payments processing for e-businesses. There are many gateways available but Stripe payment gateway is one of the most powerful and most commonly used. In this tutorial, we are going to cover the stripe payment integration in a test iOS app using Swift.
Before we start discussing the steps, I should like to clarify that this tutorial is intended for medium-level developers with basic knowledge of Xcode, Swift, Cocoapods etc.
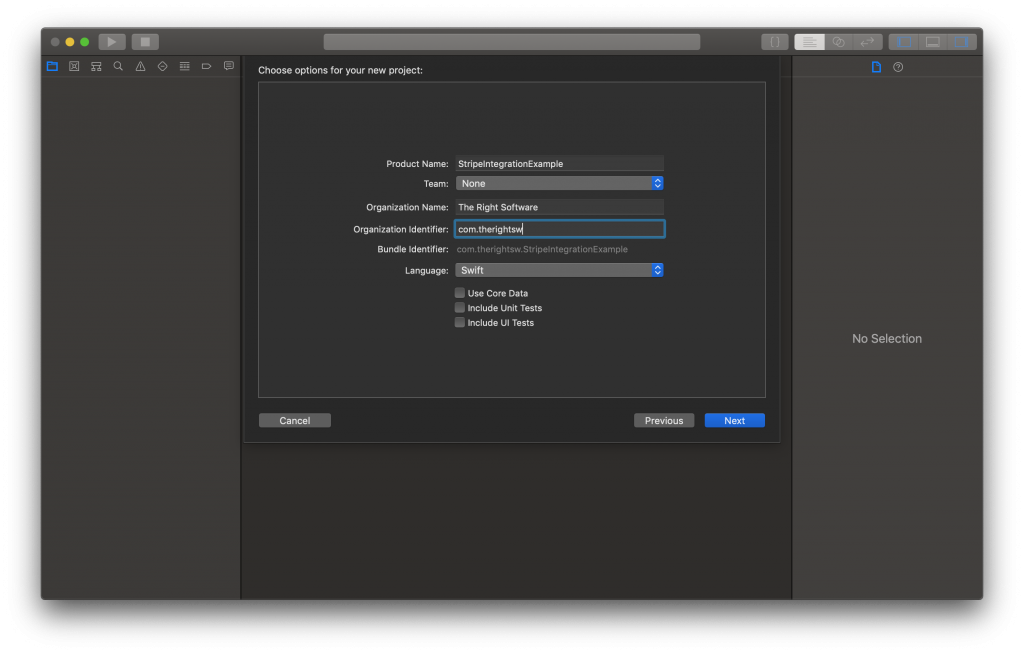
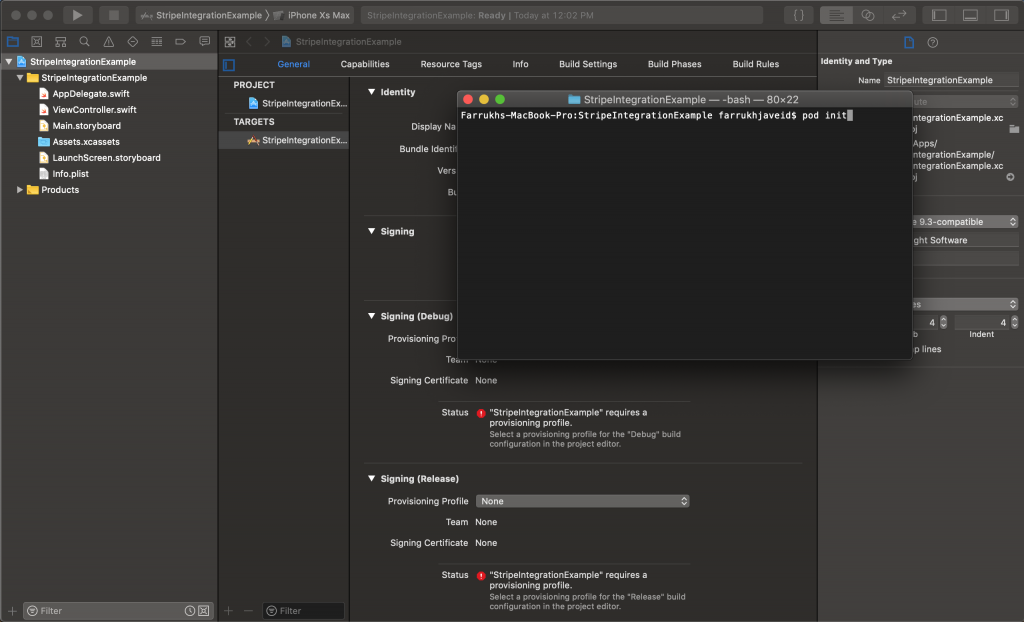
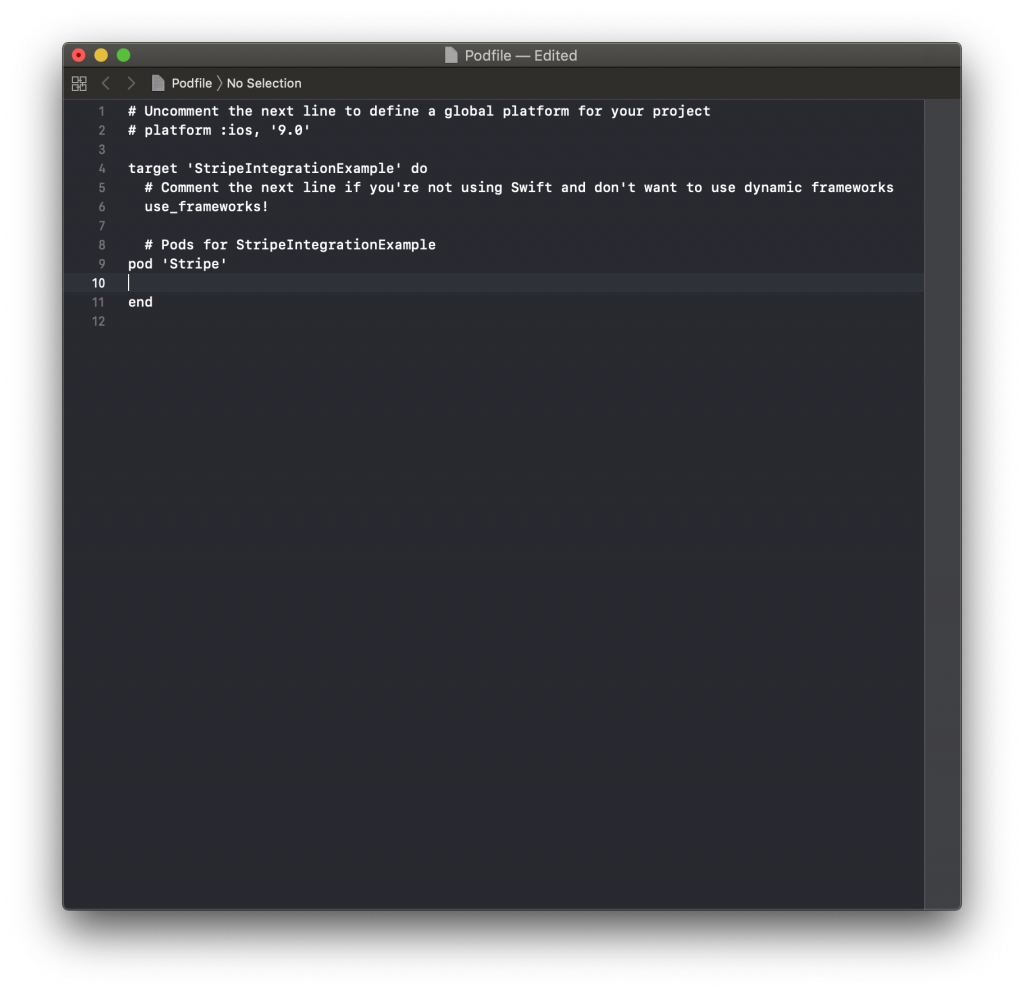
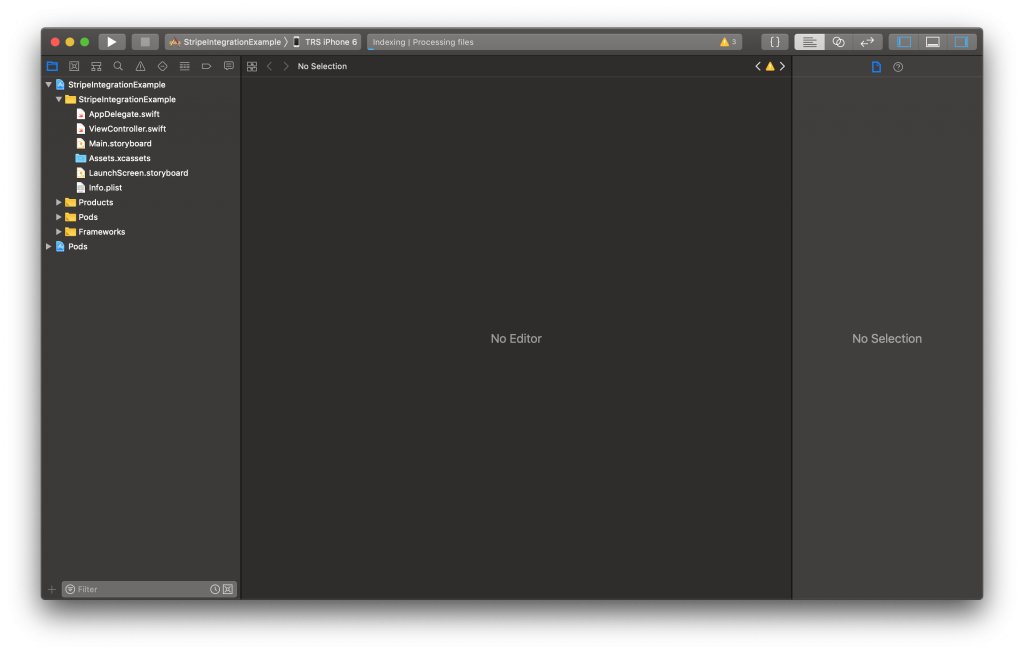
Moving on with the tutorial, let’s start the Stripe payment integration by creating a simple project. For simplicity’s sake, I am only going to post pictures for this part:
 Now, we need to initialise the Stripe SDK to see if the project has been configured properly. The last step to do here is to initialise inside the ‘didFinishLaunchingWithOptions’ method inside the ‘AppDelegate’:
 There are obviously different ways to customize this screen but you can read more about it in the SDK documentation.
We have integrated the controller, it’s time to update the controller to comply to the delegate:
 So using the Alamofire to make the API call. Let’s create a new method inside our main file to process the payment:
 Once, this is done. Stripe also provides you with a list of cards that you can use for testing this process but this requires you to use test publishable and secret keys. You can find more about it over here. The payment will be sent to your Stripe account. So, this is it; standard stripe integration using built in GUI.
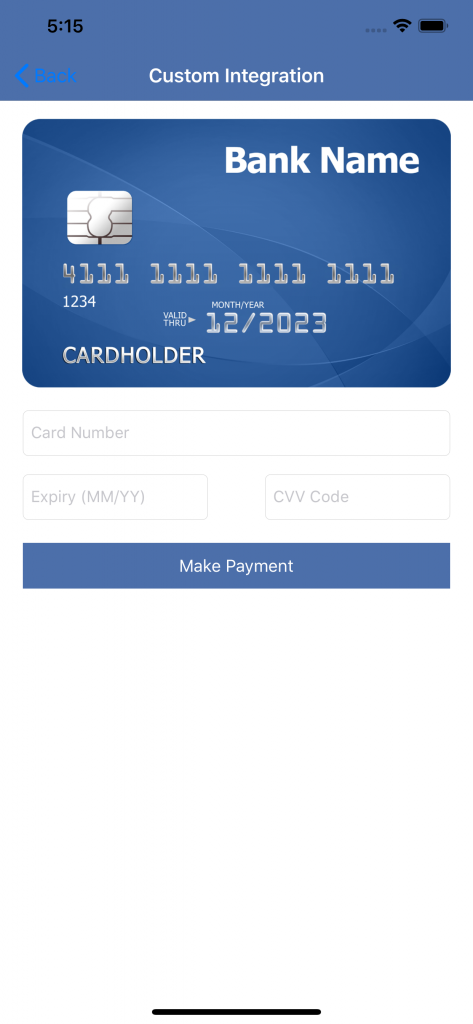 This is the test screen that we are going to use to get the user’s card details. The screen has been set up, the text fields’ delegates have been set up and all the necessary controls have been handled. This is exactly what I meant earlier, you need to manage everything by yourself.
So, we have set up the screen, we are going to use the test cards once again and start the tokenisation process. The Stripe Dev Docs have got wonderful documentation and you can check them out in complete over here. In order to convert the card to token, we are first going to convert the card information into STPCardParams and then use STPAPIClient to convert into token.
This concludes the tutorial. We have completed the stripe payment integration using both standard and custom stripe integration. I am going to add both the PHP project as well as the screenshots inside the main repository; which you can find over in our Github. There is also a related article that can help you setting up Stripe Connect for on-demand apps like Uber, Lyft. A follow article has also been published if you are interested in Stripe payments integration using Apple Pay. If you have any questions, you can always send them to me at [email protected].
1. Setting up the project

2. Setting up the Cocoapods

3. Installing the Stripe framework

4. Opening the workspace
 Now, we need to initialise the Stripe SDK to see if the project has been configured properly. The last step to do here is to initialise inside the ‘didFinishLaunchingWithOptions’ method inside the ‘AppDelegate’:
STPPaymentConfiguration.shared().publishableKey = "YourKeyHere"
Now that the project has been set up and the Stripe framework has been installed, it’s time to start working on the stripe payment integration. So this tutorial will cover two types of integration
- Standard integration
- Custom integration
1. Standard Stripe payment integration
STPAddCardViewController is a controller built inside the Stripe SDK that lets you handle every crucial detail inside the processing of a card without actually doing anything. This process has been created by Stripe itself and is as secure as possible. We’ll have to implement the delegate protocol to keep a tab of the events fired. This process will use the following steps:- Presenting STPAddCardViewController
- Implementing the delegate STPAddCardViewControllerDelegate
- Processing the payment
let config = STPPaymentConfiguration()
config.requiredBillingAddressFields = .full
let viewController = STPAddCardViewController(configuration: config, theme: STPTheme.default())
viewController.delegate = self
let navigationController = UINavigationController(rootViewController: viewController)
present(navigationController, animated: true, completion: nil)
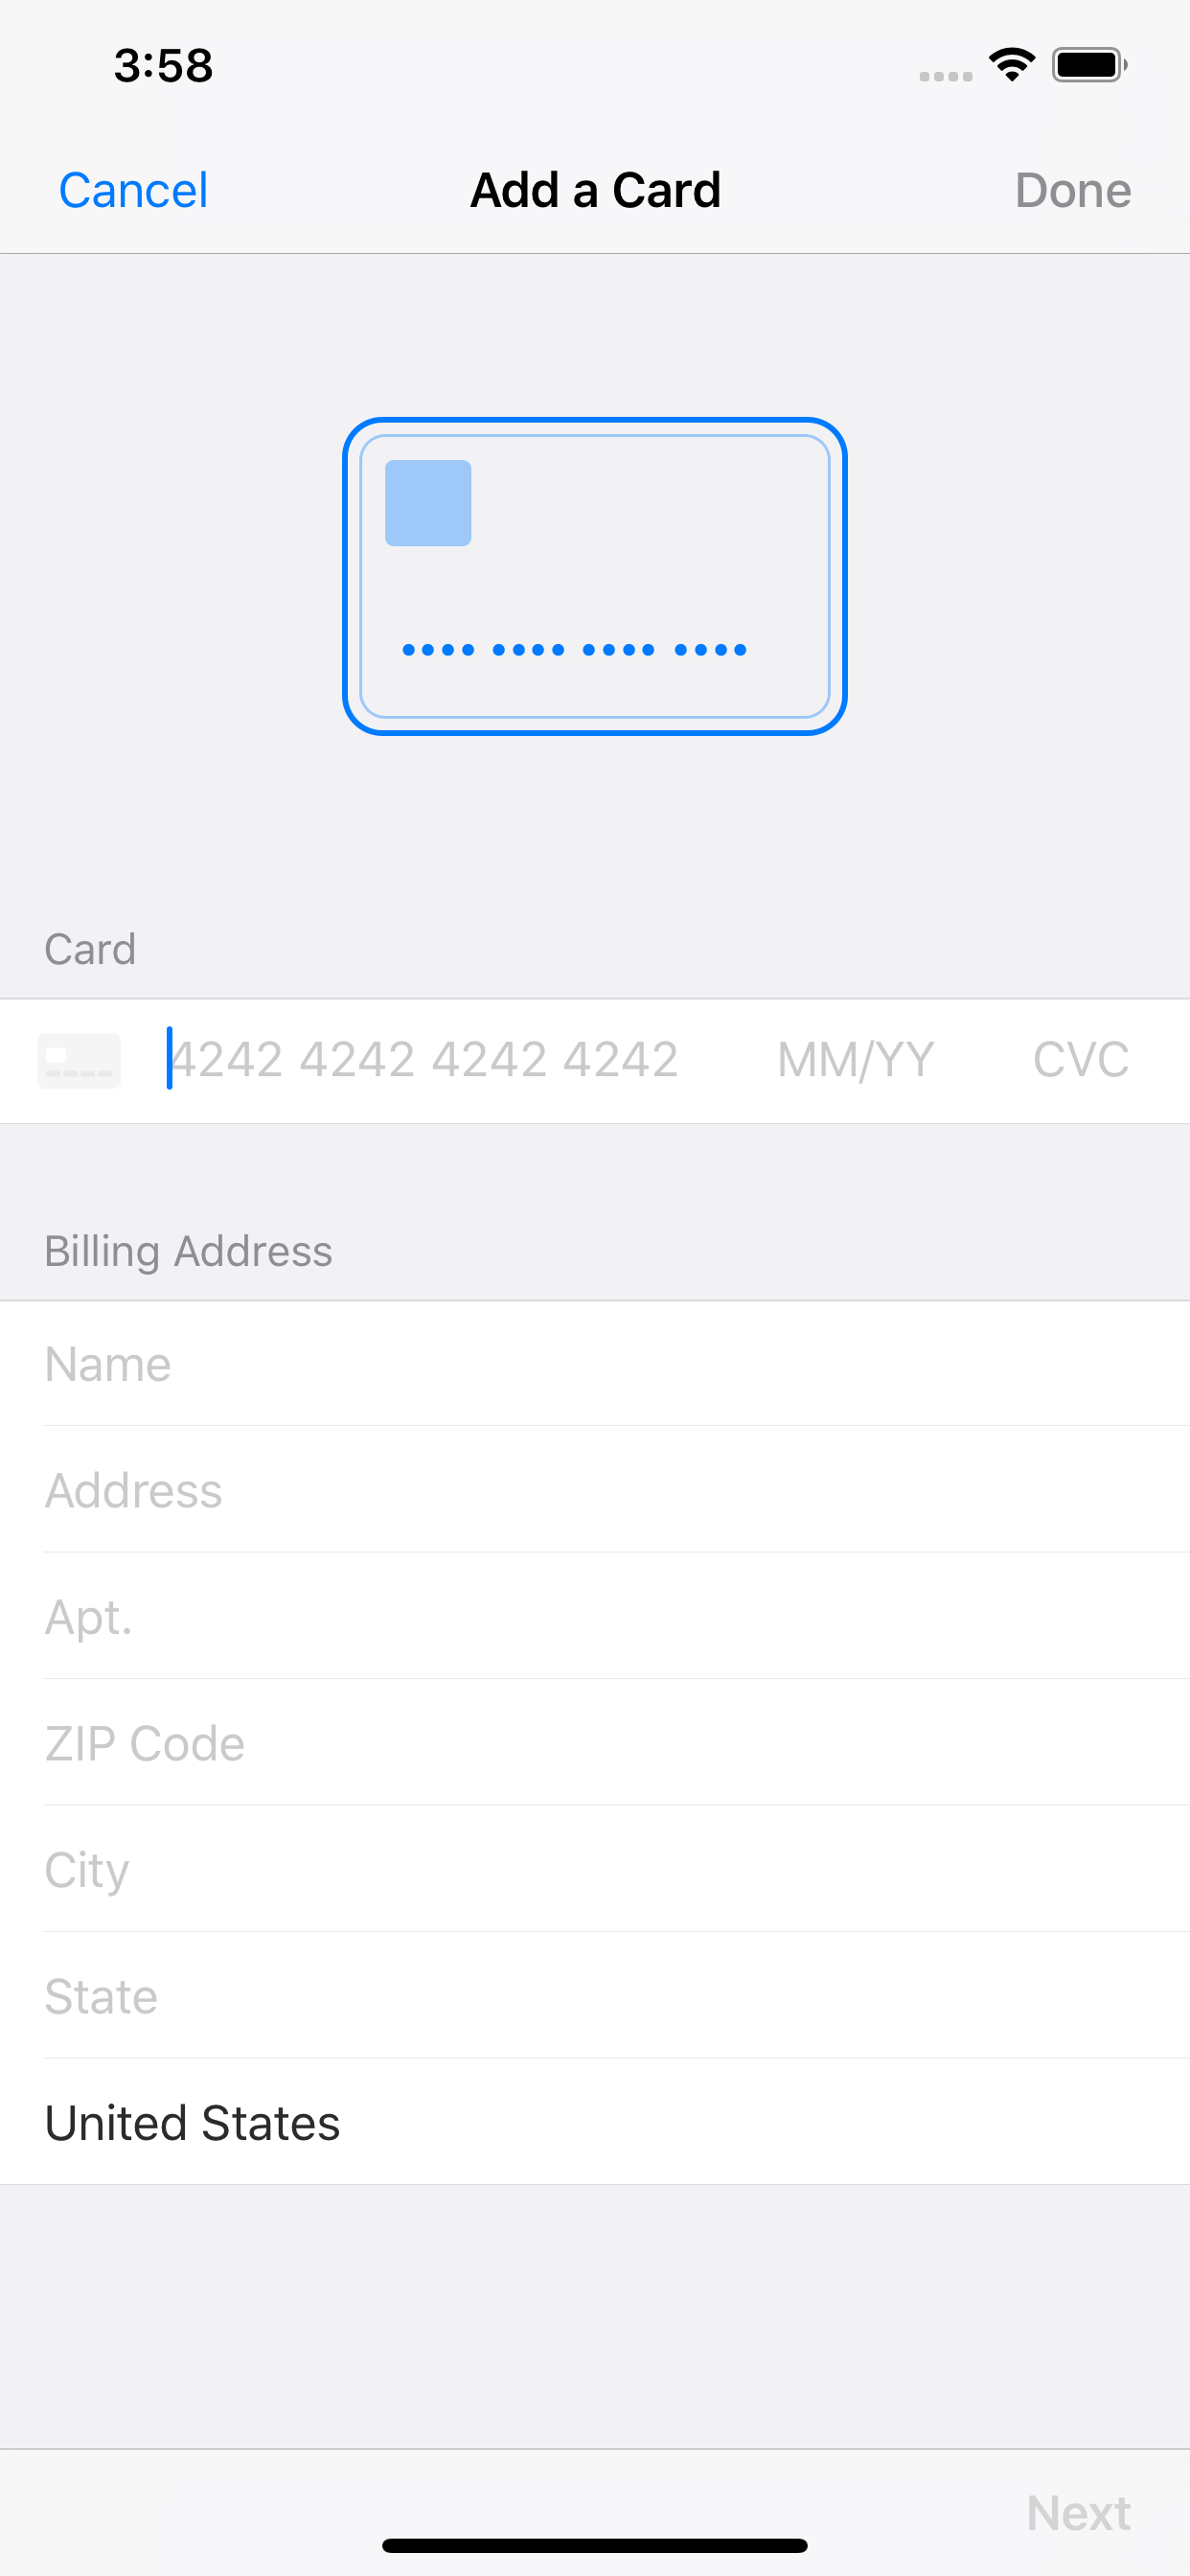
Once you have reached this step, clicking on the button should show this screen:
 There are obviously different ways to customize this screen but you can read more about it in the SDK documentation.
We have integrated the controller, it’s time to update the controller to comply to the delegate:
func addCardViewControllerDidCancel(_ addCardViewController: STPAddCardViewController) {

}

func addCardViewController(_ addCardViewController: STPAddCardViewController, didCreateToken token: STPToken, completion: @escaping STPErrorBlock) {

}
The “didCreateToken” method is what that will give us the required token to process the payment. You might also want to save it on the server to bind this card to this user or to be able to create a payment later. So, we have the token, the next step is processing the payment. We’ll need to create an API to help us achieve this process.
To keep the article simple, I have created a simple API with Stripe SDK integrated that takes the stripe token and an amount as input to process the payment. I am not going to explain this step but I have attached this web project in the main project to help you out with this step. The SDK is installed using Composer (PHP dependency manager) so this might be something worth checking out.
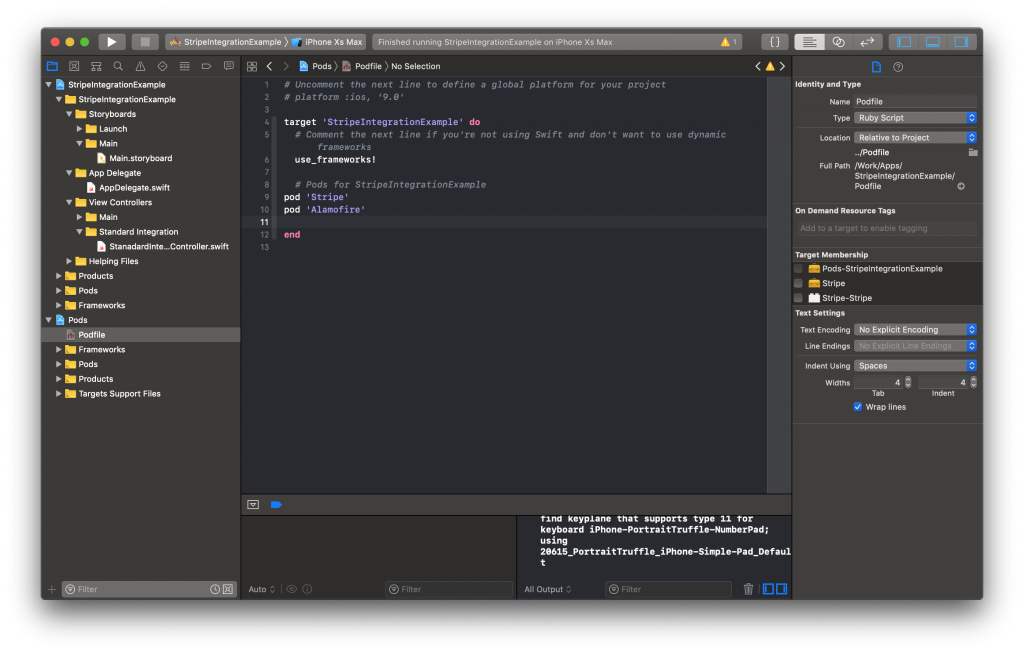
Going back to payment processing, we have our API ready. To make the API call, I am going to use a library called Alamofire. It’s a wonderful API that can help you by creating a simple and easy to understand, web request by doing everything for you. This library is going to be installed using Cocoapods, of course.
Installing the library:
 So using the Alamofire to make the API call. Let’s create a new method inside our main file to process the payment:
fileprivate func createPayment(token: String, amount: Float) {

Alamofire.request(paymentURL, method: .post, parameters: ["stripeToken": token, "amount": amount * 100],encoding: JSONEncoding.default, headers: nil).responseString {
response in
switch response.result {
case .success:
print("Success")

break
case .failure(let error):

print("Failure")
}
}
}
The amount needs to be converted into cents because that is how Stripe prefers it. By this point, you can see the payments over here:
 Once, this is done. Stripe also provides you with a list of cards that you can use for testing this process but this requires you to use test publishable and secret keys. You can find more about it over here. The payment will be sent to your Stripe account. So, this is it; standard stripe integration using built in GUI.
2. Custom Stripe payment integration
When creating custom apps, the payment gateway integration will require you to integration your own GUI. Custom GUI can give your app a streamlined look when it comes to payment screens and the rest of the app but you are, of course, responsible for maintaining everything by yourself. This part of the tutorial will help you setting up payment with a custom design and stripe card token generation. The payment processing will remain the same from part 1 so nothing is different from there. So, let’s start by creating your own screen, then we’ll dive into the SDK by converting this information into the card token. Again, in order to save some time, I am going to design the screen in the background and then we’ll discuss how to incorporate this design. This is the test screen that we are going to use to get the user’s card details. The screen has been set up, the text fields’ delegates have been set up and all the necessary controls have been handled. This is exactly what I meant earlier, you need to manage everything by yourself.
So, we have set up the screen, we are going to use the test cards once again and start the tokenisation process. The Stripe Dev Docs have got wonderful documentation and you can check them out in complete over here. In order to convert the card to token, we are first going to convert the card information into STPCardParams and then use STPAPIClient to convert into token.
Creating the card parameters:
//card parameters
let stripeCardParams = STPCardParams()
stripeCardParams.number = cardNumberField.text
let expiryParameters = expiryTextField.text?.components(separatedBy: "/")
stripeCardParams.expMonth = UInt(expiryParameters?.first ?? "0") ?? 0
stripeCardParams.expYear = UInt(expiryParameters?.last ?? "0") ?? 0
stripeCardParams.cvc = cvvTextField.text
Card parameters have been created. It’s time to convert these parameters into token using the STPAPIClient:
//converting into token
let config = STPPaymentConfiguration.shared()
let stpApiClient = STPAPIClient.init(configuration: config)
stpApiClient.createToken(withCard: stripeCardParams) { (token, error) in

if error == nil {

//Success
DispatchQueue.main.async {
self.createPayment(token: token!.tokenId, amount: 2000)
}

} else {

//failed
print("Failed")
}
}
As you can see that when the token is successfully created, I am using the same method from this standard integration to convert this token to a payment and that is because that part remains the same, it’s how you create the token and get the input matter. For custom integration, we have to parse and validate these values ourselves.
This concludes the tutorial. We have completed the stripe payment integration using both standard and custom stripe integration. I am going to add both the PHP project as well as the screenshots inside the main repository; which you can find over in our Github. There is also a related article that can help you setting up Stripe Connect for on-demand apps like Uber, Lyft. A follow article has also been published if you are interested in Stripe payments integration using Apple Pay. If you have any questions, you can always send them to me at [email protected].


