- Registering Apple merchant ID
- Creating new Apple pay certificate
- Setting Up Xcode
- Integrating Apple Pay
Registering Apple merchant ID
Registering the merchant ID is probably the easies step in this tutorial. All you have to do is follow the steps listed over here, in the official guidelines. I am going to do the same and will add the pictures as a reference: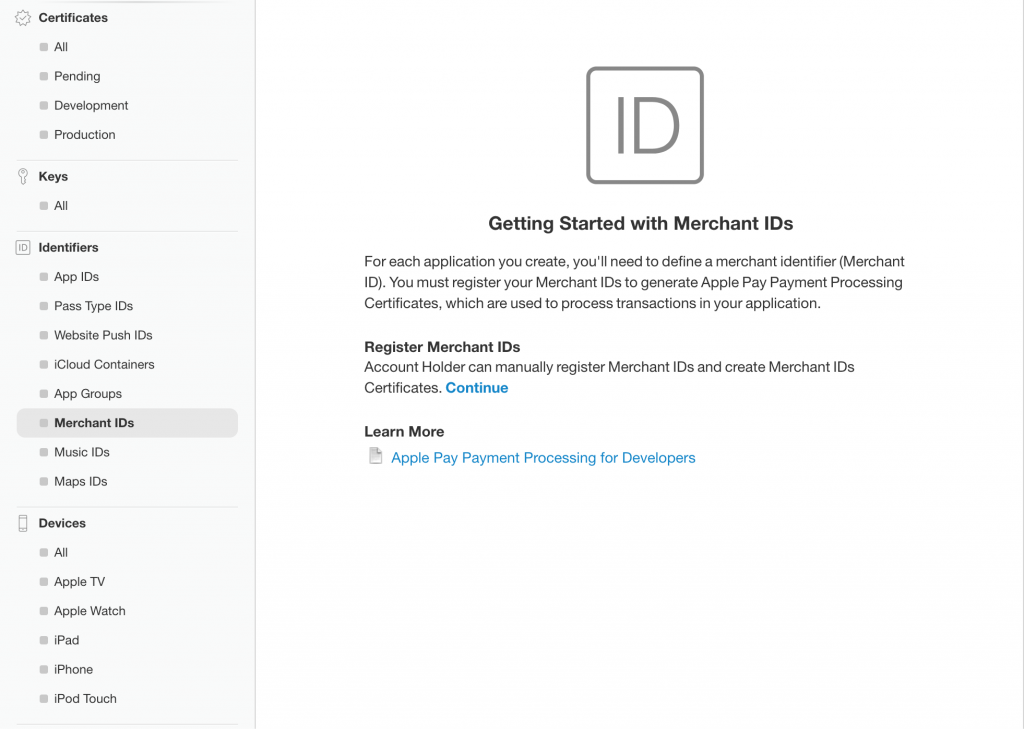 Locating the merchant ID section in the developer account:
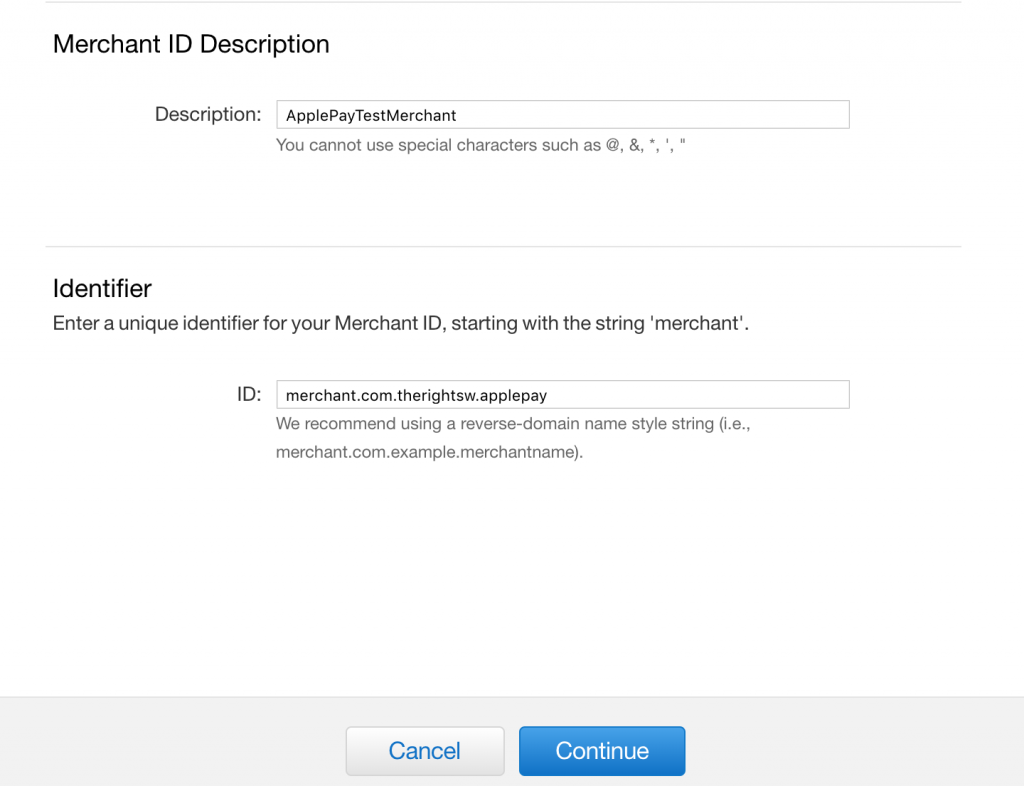 The identifier that I have set is “merchant.com.therightsw.applepay” and you can use anything but the easiest approach is using the app bundle ID with a “merchant.” prefix. So, this is it. we have set up our merchant ID. The next step is to create an Apple pay certificate.
Creating new Apple pay certificate
Apple pay certificate generation process is essentially the same as the other certificates with the iOS app signing but rather than creating a CSR file from the Keychain Access, we are going to request Stripe for the file, then upload it to the developer portal. This will generate a .cer file. We’ll use this file and register it on the Stripe and this will complete our process here. Let’s start the process:
1. Go to the Apple pay settings page on the Stripe:
and click on the Add new application button:
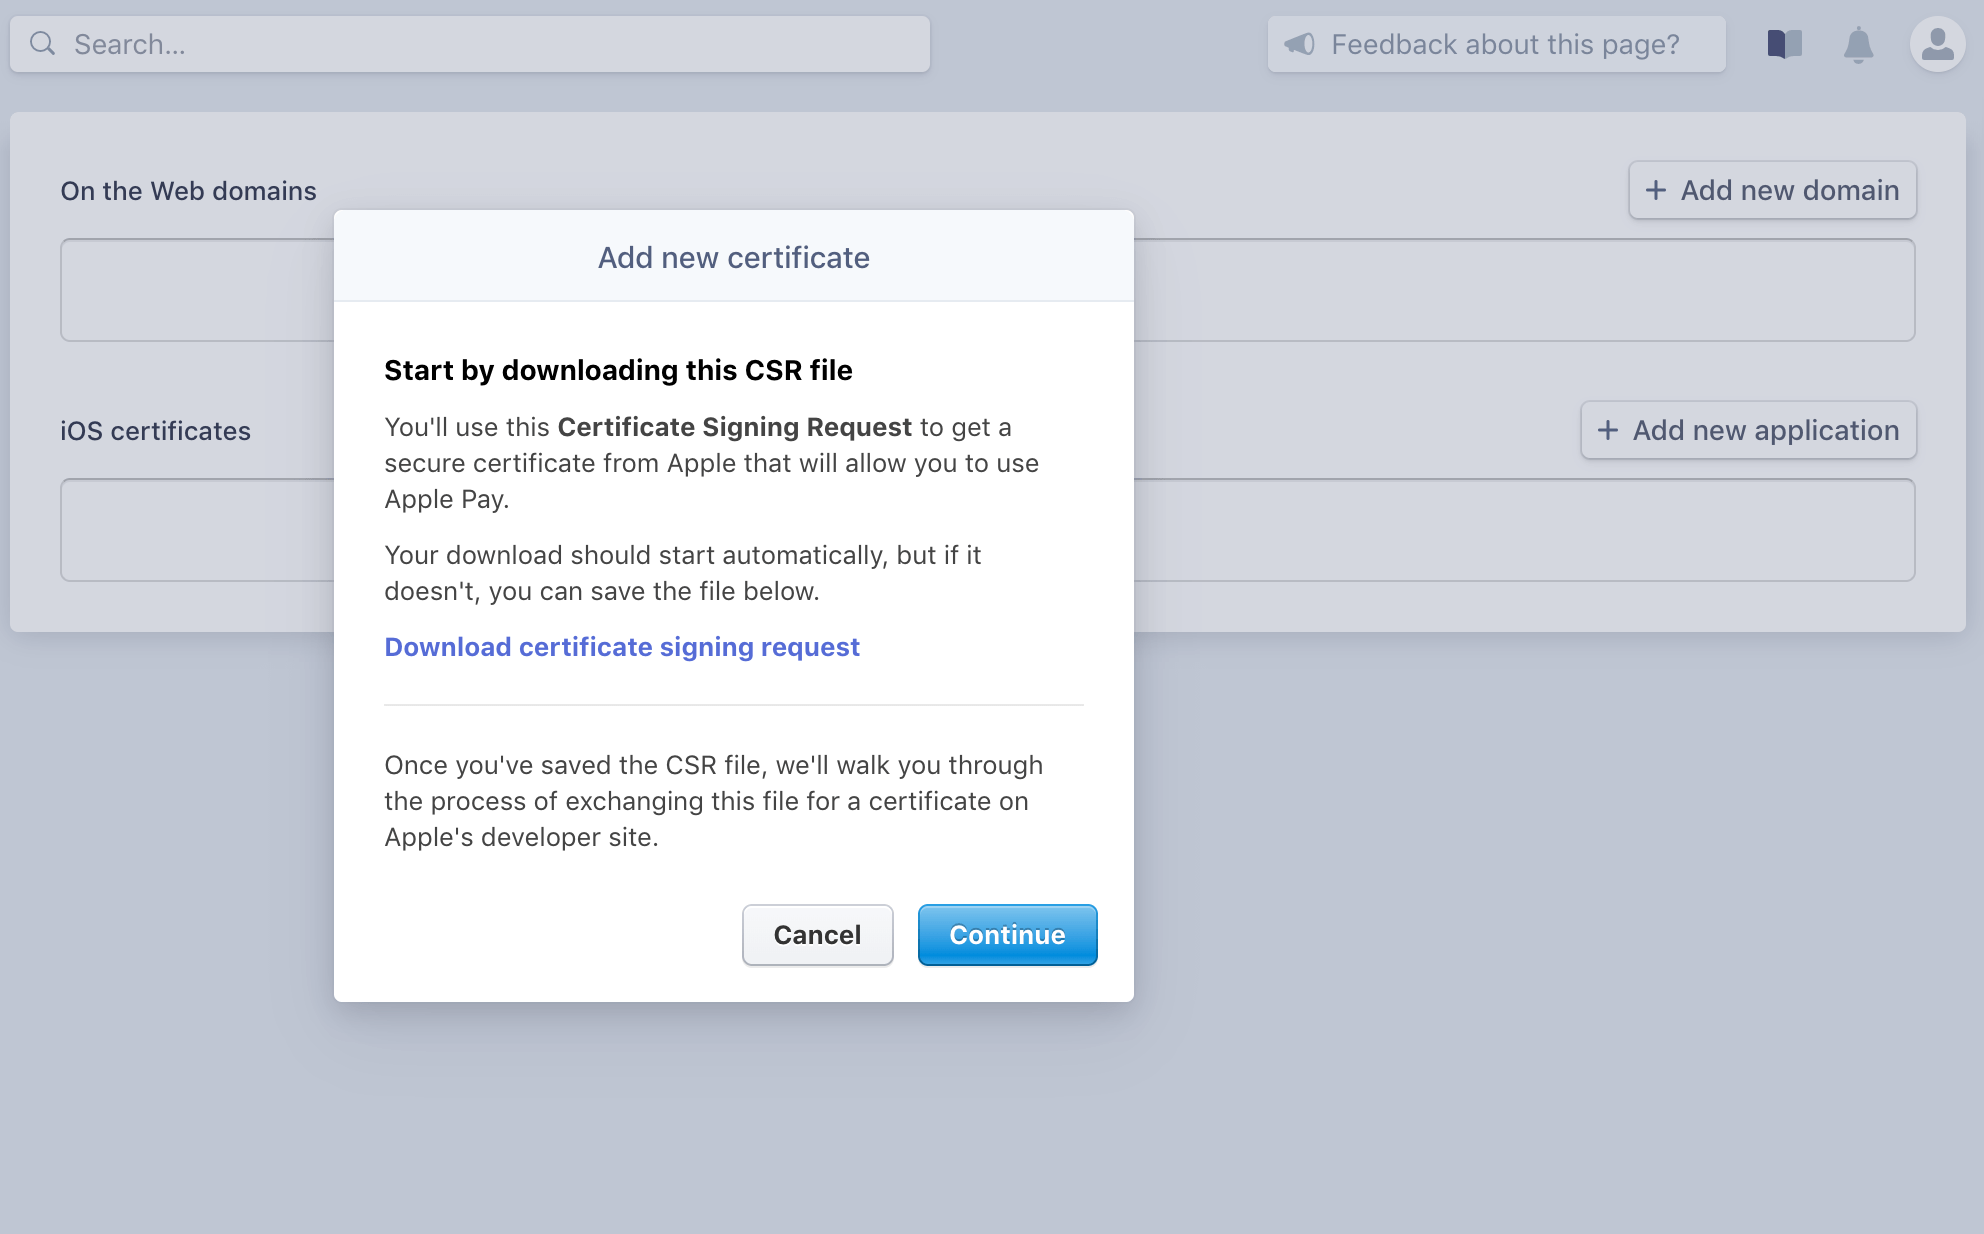
It should generate a CSR file for you. Next step is registering this file to the Apple developer portal.
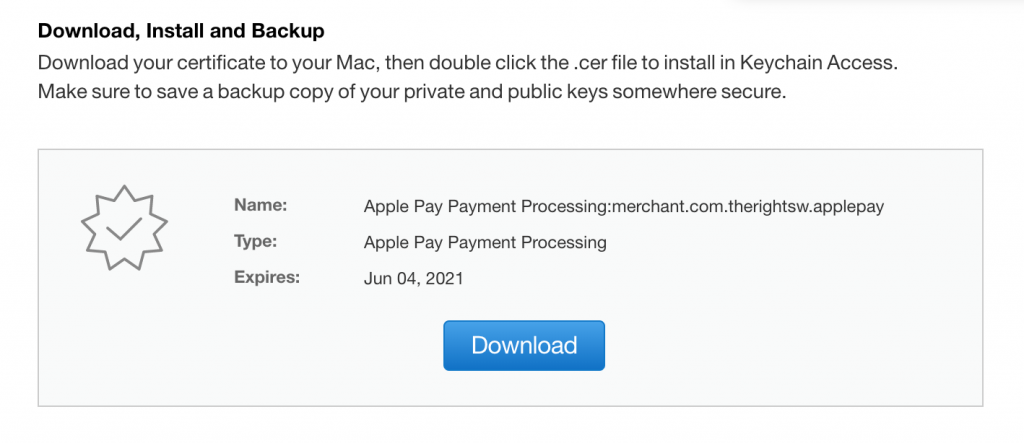
2. Let’s create the certificate. In order to do so, you need to go back to the merchant that we have registered earlier and click on the edit button. Complete the steps and use the CSR file generated by the Stripe to create the certificate. Once completed, download the certificate:
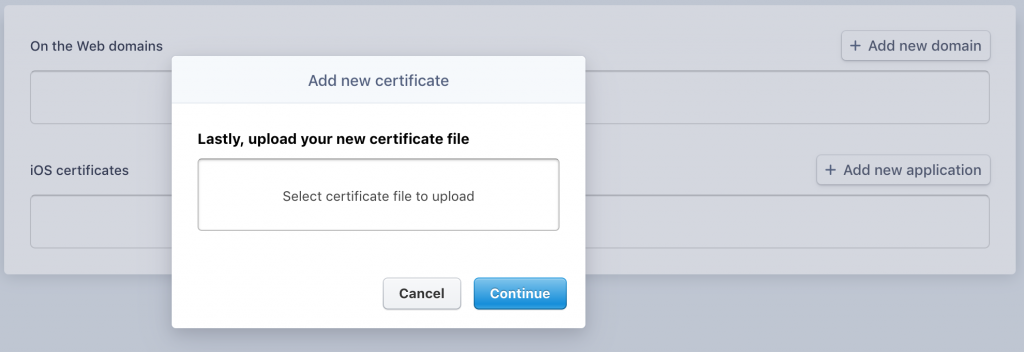
3. The last step here is to register this certificate to the Stripe.
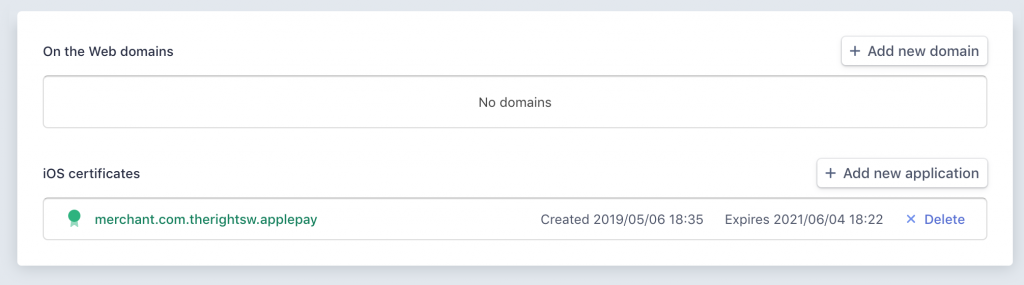
This would eventually translate into this:
Setting Up Xcode
This is the part where I would need to use Xcode. First, a project needs to be created and I have created one silently without going to the details. This is what it looks like now: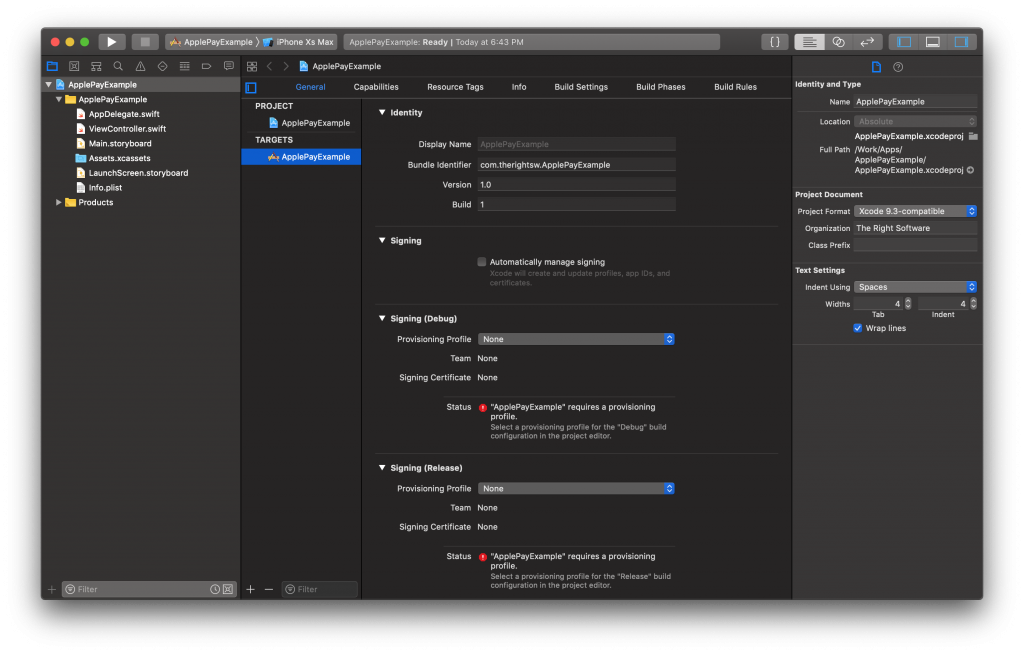
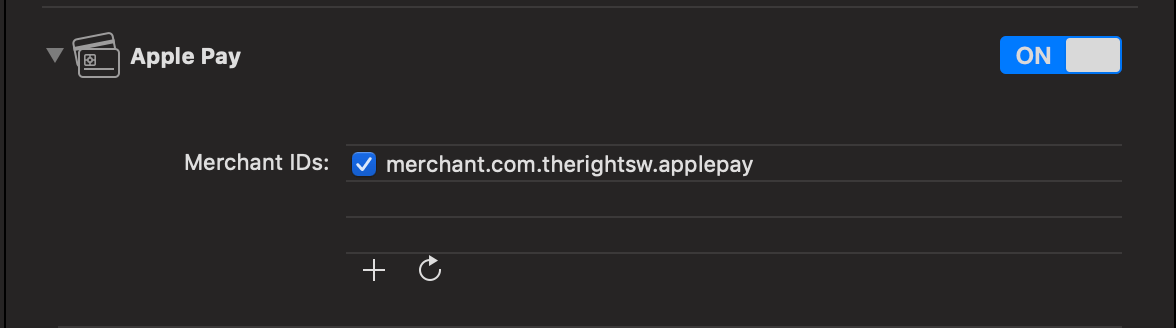
Updating the project’s capabilities by enabling the Apple pay and adding the identifier that we have created earlier. If there is any difference in the one that you have created and while you are entering it, a new merchant will be created and you’ll keep scratching your head when the payment won’t show up.
So, this is it. We have set up our registered our merchant ID, created certificate and set up our Xcode project to enable the Apple pay. Now we’ll move towards the main task i.e. integrating Apple pay using Stripe.
Integrating Apple Pay
We have already created a project for Xcode by this point. I am going to install the Stripe SDK by using the Cocoapods. This is something that I have covered in the previous article and if you have missed it, I suggest you go check it out here.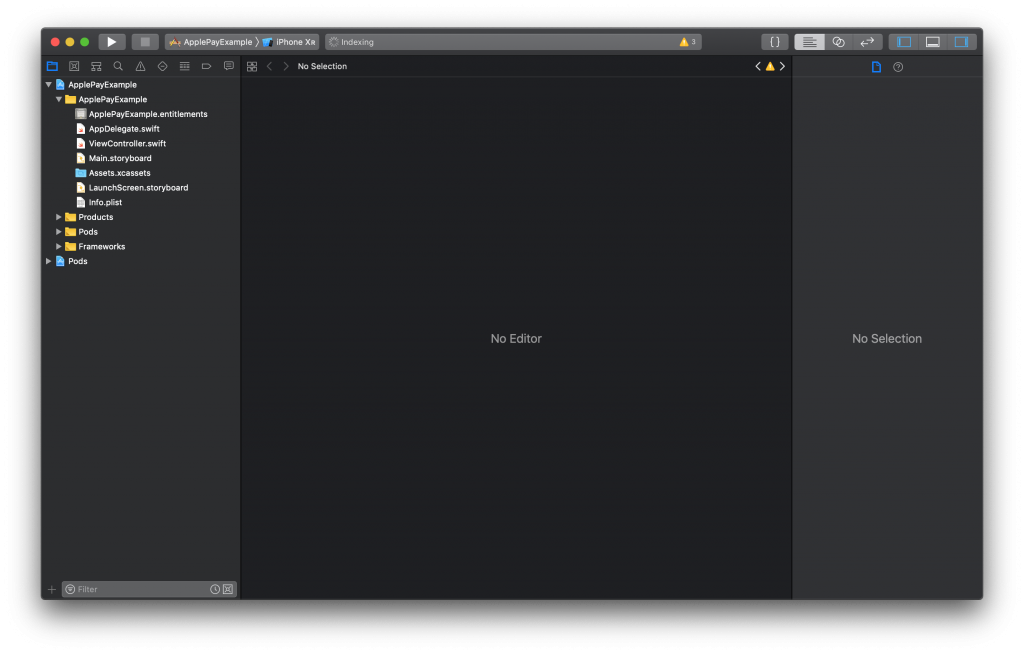
The project has been set up. So what we are going to do over here in this tutorial is to create a list of items each containing a price tag and then on the detail page, we’ll add the pay with the Apple Pay button. I have a JSON file containing fruits with an image and a price. Let’s start by creating a struct for the fruit model:
struct Fruit {
let name: String!
let image: String!
let price: Int!
}
Let’s fetch the file contents:
fileprivate func loadJsonFileContents() {

let asset = NSDataAsset(name: "fruits", bundle: Bundle.main)
if let fruitsDictionary = try? JSONSerialization.jsonObject(with: asset!.data, options: JSONSerialization.ReadingOptions.allowFragments) as? [String: Any] {

if let fruitsArray = fruitsDictionary["fruits"] as? [[String: Any]] {

for currentFruitDictionary in fruitsArray {

//name
var fruitName = ""
if let name = currentFruitDictionary["name"] as? String {
fruitName = name
}

//image
var fruitImage = ""
if let image = currentFruitDictionary["image"] as? String {
fruitImage = image
}

//price
var fruitPrice = 0
if let price = currentFruitDictionary["price"] as? Int {
fruitPrice = price
}

//model
let fruit = Fruit(name: fruitName, image: fruitImage, price: fruitPrice)
fruits.append(fruit)
}
}
}
}
JSON file has been read and converted into a fruit array. The next step here is going to be loading this into a table view and then into a detail screen but this part is going to be done silently to avoid any time overhead.
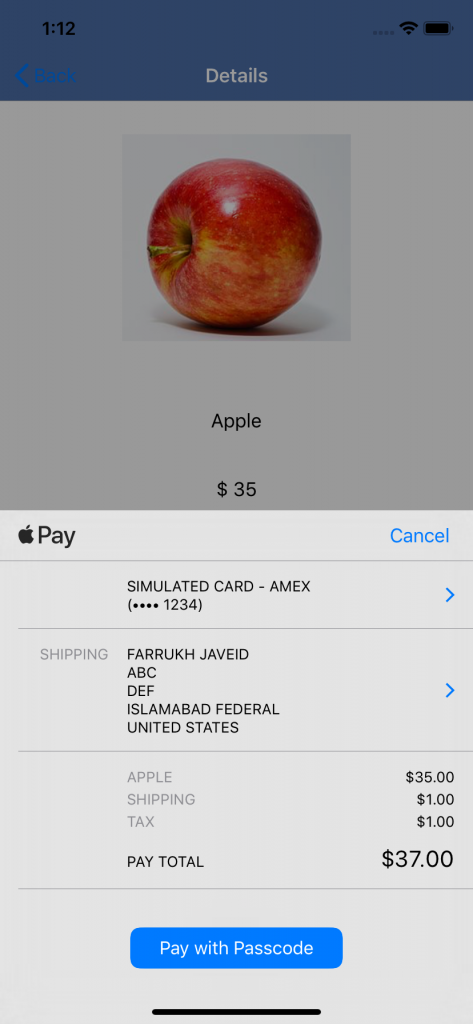
After this process has been completed, this is how the screen looks like:

Integrating Apple Pay inside the app is going to follow the same model as we are doing this with the cards apart from some additional steps with the payment controller. We’ll create an PKPaymentButton and use that to launch the PKPaymentAuthorizationViewController to get the authorisation. Once authorised, we’ll use the STPAPIClient to convert this authorisation into the STPToken and we’ll use that to generate the payment. Easy! Let’s start with setting up the button. I have already created a button on the GUI and updated it’s class to PKPaymentButton. You can also create your own custom button via code but that is completely your choice. Updating the button by checking if payment can be done and adding a selector for touch up inside event tracking:
paymentButton.addTarget(self, action: #selector(applePayButtonTapped(sender:)), for: .touchUpInside)
paymentButton.isEnabled = Stripe.deviceSupportsApplePay()
Let’s set up the event by creating this method:
@objc fileprivate func applePayButtonTapped(sender: UIButton) {

let paymentNetworks:[PKPaymentNetwork] = [.amex,.masterCard,.visa]

if PKPaymentAuthorizationViewController.canMakePayments(usingNetworks: paymentNetworks) {
let request = PKPaymentRequest()

request.merchantIdentifier = "merchant.com.therightsw.applepay"
request.countryCode = "US"
request.currencyCode = "USD"
request.supportedNetworks = paymentNetworks
request.requiredShippingContactFields = [.name, .postalAddress]
request.merchantCapabilities = .capability3DS

let fruit = PKPaymentSummaryItem(label: selectedFruit.name, amount: NSDecimalNumber(decimal:Decimal(selectedFruit.price)), type: .final)
let shipping = PKPaymentSummaryItem(label: "Shipping", amount: NSDecimalNumber(decimal:1.00), type: .final)
let tax = PKPaymentSummaryItem(label: "Tax", amount: NSDecimalNumber(decimal:1.00), type: .final)
let total = PKPaymentSummaryItem(label: "Total", amount: NSDecimalNumber(decimal:2.00 + Decimal(selectedFruit.price)), type: .final)
request.paymentSummaryItems = [fruit, shipping, tax, total]

let authorizationViewController = PKPaymentAuthorizationViewController(paymentRequest: request)

if let viewController = authorizationViewController {
viewController.delegate = self

present(viewController, animated: true, completion: nil)
}
}
}
This will generate the interface to let you add your shipping address as well as completing your payment:
Once this is complete, we’ll need to add the PKPaymentAuthorizationViewControllerDelegate to track the payment events from this controller. You can check more about the delegate from the Apple’s official documentation. For simplicity’s sake, I am only integrating two methods:
func paymentAuthorizationViewController(_ controller: PKPaymentAuthorizationViewController, didAuthorizePayment payment: PKPayment, handler completion: @escaping (PKPaymentAuthorizationResult) -> Void) {

STPAPIClient.shared().createToken(with: payment) { (stripeToken, error) in
guard error == nil, let stripeToken = stripeToken else {
print(error!)
return
}
}

func paymentAuthorizationViewControllerDidFinish(_ controller: PKPaymentAuthorizationViewController) {
// Dismiss the Apple Pay UI
dismiss(animated: true, completion: nil)
}
The “didAuthorizePayment” is what going to help us make the payment. Here, we have used the STPAPIClient to create the token from the RKPayment object. Once this object is created, all we have to do is to create a payment by using the API call that we created in the first function:
Alamofire.request(self.paymentURL, method: .post, parameters: ["stripeToken": stripeToken.tokenId, "amount": self.selectedFruit.price * 100],encoding: JSONEncoding.default, headers: nil).responseString {
response in
switch response.result {
case .success:
print("Success")
completion(PKPaymentAuthorizationResult(status: .success, errors: nil))

break
case .failure(let error):

print("Failure")
completion(PKPaymentAuthorizationResult(status: .failure, errors: nil))

}
}
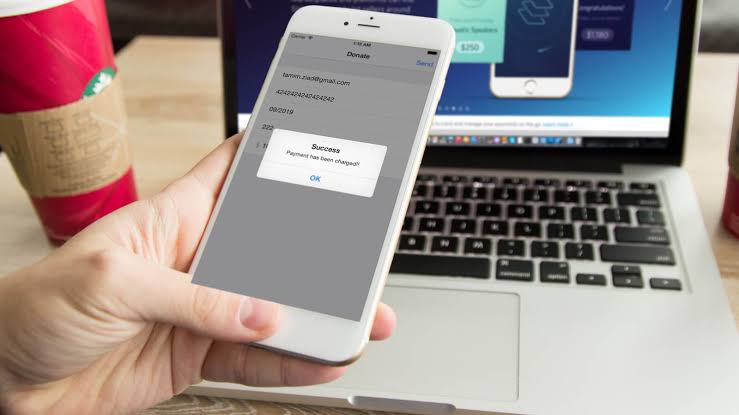
When everything is compiled, making a payment should be easy.
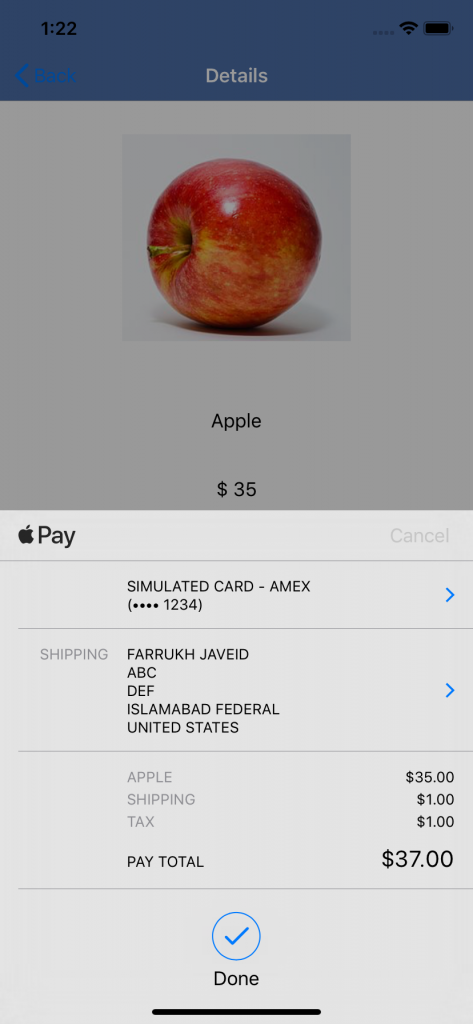 Success!!!
Well, this completes our integrating Apple Pay tutorial. We have been successful in integrating Apple pay with Stripe in our iOS app. I am going to attach the screenshots as well as the API in this project as well. I cannot stress you enough to not rely on this tutorial only but go ahead and give the documentation a full read as well. You can find the source code for this project over our Git repository and if you have any technical query, you can drop an email at [email protected].