Best way to show loading indicator
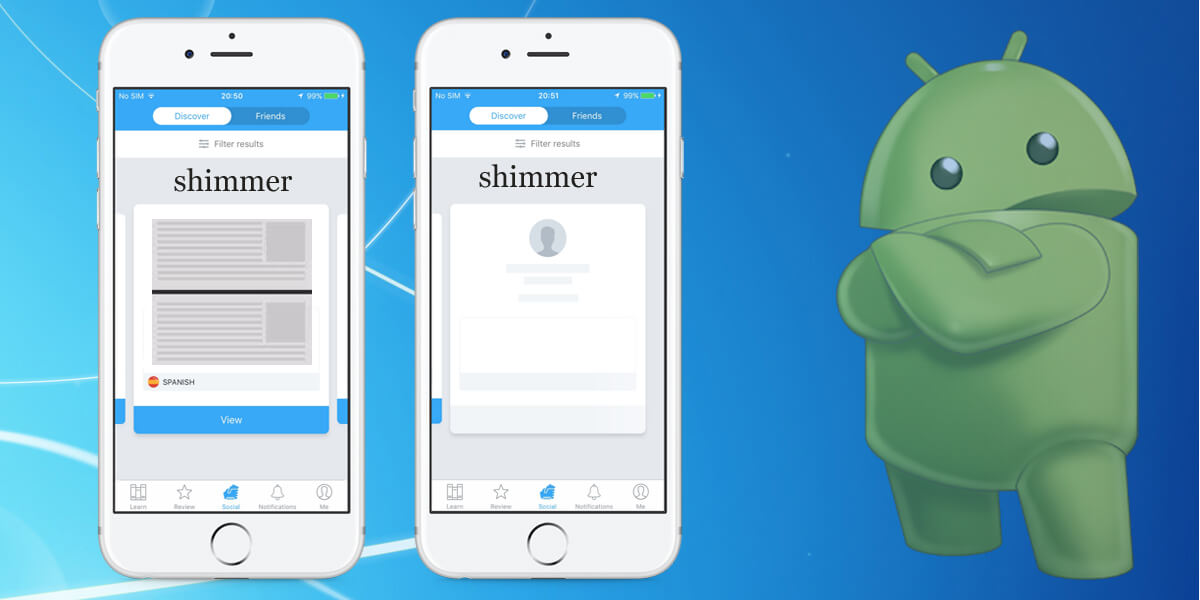
Shimmer effect in Android provides an elegant solution to the loading screen. With the deprecation of Android ProgressDialog in APIv26, Google discouraged the usage of UI blocking loading widgets which prevent the user from interacting with the app, e.g. navigating back, while its content is loading. As alternatives, they suggested the usage of ProgressBar and Notification. But, Notification message is displayed outside your app’s UI and ProgressBar does not always match your app’s native design or UI and has to be customized a lot. To enhance the user experience Facebook built an Android library named Shimmer, that provides an easy way to add a shimmering effect to your UI while the content is being loaded. You can see this effect almost everywhere as it has become a standard among UI designers. In this post we will see how we can elegantly handle the content loading using Shimmer library. So, let’s dive into the code:Step 1 : Download
Add the following dependency in your project to include Shimmer// Gradle dependency on Shimmer for Android
dependencies {
implementation 'com.facebook.shimmer:shimmer:0.5.0'
}
!-- Maven dependency on Shimmer for Android --
<dependency>
   <groupId>com.facebook.shimmer</groupId>
   <artifactId>shimmer</artifactId>
   <version>0.5.0</version>
</dependency>
Step 2 : Modify your values/colors.xml
Add the following color in you colors.xml file<color name="shimmer_item_color">#808080</color>
Step 3 : Modify your values/dimens.xml
Add the following dimens in your dimens.xml<dimen name="imageWidth">74dp</dimen>
<dimen name="imageHeight">74dp</dimen>
<dimen name="marginStandard">12dp</dimen>
<dimen name="paddingStandard">8dp</dimen>
<dimen name="textSizeHeading">12sp</dimen>
<dimen name="textSizeDescription">10sp</dimen>
<dimen name="shimmerItemHeight">90dp</dimen>
Step 4 : Create a new layout file
<?xml version="1.0" encoding="utf-8"?>
<androidx.constraintlayout.widget.ConstraintLayout xmlns:android="http://schemas.android.com/apk/res/android"
xmlns:app="http://schemas.android.com/apk/res-auto"
android:layout_width="match_parent"
android:layout_height="@dimen/_90sdp">

<ImageView
android:id="@+id/iv"
android:layout_width="@dimen/imageWidth"
android:layout_height="@dimen/imageWidth"
android:layout_marginStart="@dimen/marginStandard"
android:layout_marginEnd="@dimen/marginStandard"
android:background="@color/shimmer_item_color"
android:scaleType="centerCrop"
app:layout_constraintBottom_toBottomOf="parent"
app:layout_constraintStart_toStartOf="parent"
app:layout_constraintTop_toTopOf="parent" />

<TextView
android:id="@+id/titleTv"
android:layout_width="0dp"
android:layout_height="wrap_content"
android:layout_marginStart="@dimen/paddingStandard"
android:layout_marginEnd="@dimen/paddingStandard"
android:background="@color/shimmer_item_color"
android:textSize="@dimen/textSizeHeading"
app:layout_constraintBottom_toTopOf="@id/desTv"
app:layout_constraintEnd_toEndOf="parent"
app:layout_constraintStart_toEndOf="@id/iv"
app:layout_constraintTop_toTopOf="@id/iv" />

<TextView
android:id="@+id/desTv"
android:layout_width="0dp"
android:layout_height="wrap_content"
android:background="@color/shimmer_item_color"
android:lines="2"
android:textSize="@dimen/textSizeDescription"
app:layout_constraintBottom_toBottomOf="@id/iv"
app:layout_constraintEnd_toEndOf="@id/titleTv"
app:layout_constraintStart_toStartOf="@id/titleTv"
app:layout_constraintTop_toBottomOf="@id/titleTv" />

</androidx.constraintlayout.widget.ConstraintLayout>
Step 5 : Modify your existing files
In your layout file, where you want to show the shimmer effect, add the following code at the very bottom:<com.facebook.shimmer.ShimmerFrameLayout
android:id="@+id/shimmerLoadingView"
android:layout_width="wrap_content"
android:layout_height="wrap_content"
android:layout_gravity="center"
android:orientation="vertical"
shimmer:duration="800">
<!-- Adding 7 rows of placeholders -->
<LinearLayout
android:layout_width="match_parent"
android:layout_height="wrap_content"
android:orientation="vertical">
<include layout="@layout/shimmer" />
<include layout="@layout/shimmer" />
<include layout="@layout/shimmer" />
<include layout="@layout/shimmer" />
<include layout="@layout/shimmer" />
<include layout="@layout/shimmer" />
<include layout="@layout/shimmer" />
</LinearLayout>
</com.facebook.shimmer.ShimmerFrameLayout>
In your Java file, where the above mentioned layout file is set as content view, add the following code:
pirvate ShimmerFrameLayout shimmerLoadingView;
@Override
protected void onCreate(Bundle savedInstanceState) {
    super.onCreate(savedInstanceState);
    setContentView(R.layout.layout_file_name);
    shimmerLoadingView = findViewById(R.id.shimmerLoadingView);
    loadData();
}
@Override
public void onDataAvailable(Data data) {
    shimmerLoadingView.stopShimmerAnimation();
    shimmerLoadingView.setVisibility(View.GONE);
    //handle/load your data into your UI components
@Override
public void onResume() {
    super.onResume();
    shimmerLoadingView.startShimmerAnimation();
}

@Override
protected void onPause() {
    shimmerLoadingView.stopShimmerAnimation();
    super.onPause();
}
All our apps come with Shimmer effect built in. Don’t hesitate to discuss your app project.