
Introduction
This comprehensive guide will walk you through integrating Stripe payment processing into an Angular application with a TypeScript backend. This implementation provides a complete, production-ready solution for handling dynamic payments with proper configuration and setup.
What is Stripe?
Stripe is a leading payment processing platform that enables businesses to accept payments online securely. It provides:
Security: PCI-compliant payment processing
Global Reach: Support for 135+ currencies and multiple payment methods
Developer-Friendly: Well-documented APIs and SDKs
Flexibility: Customizable checkout experiences
Why This Implementation?
This guide provides:
Dynamic Payment Amounts: Users can enter custom payment amounts
Integrated Backend: TypeScript Express server included
Type Safety: Full TypeScript implementation
Production Ready: Error handling, validation, and security best practices
Latest Topic About Angular 18: Zoneless change detection in Angular 18
Features
Core Features
Dynamic Payment Processing: Users can specify custom amounts and descriptions
Secure Checkout: Stripe-hosted checkout page for PCI compliance
Success/Cancel Handling: Dedicated pages for payment outcomes
Real-time Validation: Client and server-side validation
Error Handling: Comprehensive error messages and handling
Technical Features
Angular 21: Latest Angular features with standalone components
TypeScript Backend: Type-safe Express server
Integrated Development: Frontend and backend run together
Proxy Configuration: Seamless API communication in development
Environment Configuration: Separate configs for development and production
Prerequisites
Before starting, ensure you have the following installed:
Required Software
Node.js (v18 or higher)
Download from: https://nodejs.org/
Verify installation: node –version
npm (comes with Node.js)
Verify installation: npm –version
Angular CLI (v21 or higher)
npm install -g @angular/cli
Verify installation: ng version
Stripe Account
Sign up at: https://stripe.com
Access test API keys from: https://dashboard.stripe.com/test/apikeys
Recommended Tools
Code Editor: Visual Studio Code (recommended)
Git: For version control
Postman/Thunder Client: For API testing (optional)
Project Overview
Architecture
This project follows a full-stack architecture:
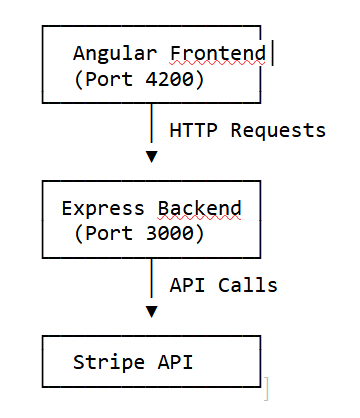
Payment Flow
User enters payment details on checkout page
Frontend sends request to backend API
Backend creates Stripe Checkout Session
User is redirected to Stripe’s secure checkout page
After payment, Stripe redirects to success/cancel page
Step 1: Clone or Create Project
Installation & Setup
If starting fresh:
ng new angular-stripe
cd angular-stripe
Step 2: Install Dependencies
Install all required packages:
npm installThis installs: – Angular core packages – Express and related backend dependencies – Stripe SDK – TypeScript and development tools
Step 3: Verify Installation
Check that all packages are installed correctly:
npm list --depth=0Configuration
Backend Configuration
1. Create Environment File
Create a .env file in the server/ directory:
# server/.env
STRIPE_SECRET_KEY=sk_test_your_stripe_secret_key_here
PORT=3000
Important Notes: – Replace sk_test_your_stripe_secret_key_here with your actual Stripe secret key – Never commit .env files to version control – Use test keys for development, live keys for production
2. Get Stripe API Keys
Log in to Stripe Dashboard
Navigate to Developers → API keys
Copy your Secret key (starts with sk_test_)
Copy your Publishable key (starts with pk_test_)
Frontend Configuration
1. Configure Environment Files
Development (src/environments/environment.ts):
export const environment = {
production: false,
apiUrl: ‘http://localhost:3000’
};
Production (src/environments/environment.prod.ts):
export const environment = {
production: true,
apiUrl: ‘https://your-api-domain.com’
};
Project Structure
angular-stripe/
├── server/ # Backend server
│ ├── index.ts # Express server with Stripe integration
│ ├── tsconfig.json # TypeScript configuration
│ └── .env # Environment variables (not in git)
├── src/
│ ├── app/
│ │ ├── pages/
│ │ │ ├── checkout/ # Checkout page component
│ │ │ ├── success/ # Success page component
│ │ │ └── cancel/ # Cancel page component
│ │ ├── services/
│ │ │ └── stripe.service.ts # Stripe API service
│ │ ├── app.component.ts
│ │ └── app.routes.ts # Route configuration
│ ├── assets/
│ │ └── images/ # Static assets
│ └── environments/ # Environment configurations
├── proxy.conf.json # Development proxy configuration
├── package.json # Dependencies and scripts
└── README.md # Quick start guide
Backend Implementation
Server Setup (server/index.ts)
The backend server is built with Express and TypeScript:
import dotenv from 'dotenv';
import express, { Request, Response } from 'express';
import cors from 'cors';
import Stripe from 'stripe';
import path from 'path';

dotenv.config({ path: path.resolve(process.cwd(), 'server', '.env') });

const app = express();
const PORT: number = parseInt(process.env.PORT || '3000', 10);
const stripe = new Stripe(process.env.STRIPE_SECRET_KEY as string);

app.use(cors());
app.use(express.json());
Key Points: – Uses dotenv to load environment variables – CORS enabled for frontend communication – JSON body parser for request handling – TypeScript for type safety
Checkout Session Endpoint
app.post('/api/create-checkout-session', async (req, res) => {
  try {
    const { amount, description, successUrl, cancelUrl } = req.body;

    if (!amount || amount <= 0) {
      return res.status(400).json({ error: 'Invalid amount' });
    }

    const amountInCents = Math.round(amount * 100);
    const origin = req.headers.origin || 'http://localhost:4200';

    const session = await stripe.checkout.sessions.create({
      payment_method_types: ['card'],
      line_items: [{
        price_data: {
          currency: 'usd',
          product_data: { name: description || 'Payment' },
          unit_amount: amountInCents,
        },
        quantity: 1,
      }],
      mode: 'payment',
      success_url: successUrl || `${origin}/success?session_id={CHECKOUT_SESSION_ID}`,
      cancel_url: cancelUrl || `${origin}/cancel`,
    });

    res.json({ sessionId: session.id, url: session.url });
  } catch (error) {
    console.error('Error creating checkout session:', error);
    res.status(500).json({ error: error.message });
  }
});
Explanation: – Validates amount input – Converts dollars to cents (Stripe requirement) – Creates Stripe Checkout Session – Returns session URL for redirection
Frontend Implementation
Stripe Service (src/app/services/stripe.service.ts)
import { Injectable, inject } from '@angular/core';
import { HttpClient } from '@angular/common/http';
import { Observable } from 'rxjs';
import { environment } from '../../environments/environment';

export interface CheckoutSessionRequest {
  amount: number;
  description?: string;
  successUrl?: string;
  cancelUrl?: string;
}

export interface CheckoutSessionResponse {
  sessionId: string;
  url: string;
}

@Injectable({
  providedIn: 'root'
})
export class StripeService {
  private http = inject(HttpClient);
  private apiUrl = environment.production
    ? (environment.apiUrl || 'http://localhost:3000')
    : '/api';

  createCheckoutSession(request: CheckoutSessionRequest): Observable<CheckoutSessionResponse> {
    return this.http.post<CheckoutSessionResponse>(
      `${this.apiUrl}/create-checkout-session`,
      request
    );
  }
}
Checkout Component (src/app/pages/checkout/checkout.component.ts)
import { Component, inject } from '@angular/core';
import { FormsModule } from '@angular/forms';
import { StripeService } from '../../services/stripe.service';

@Component({
  selector: 'app-checkout',
  standalone: true,
  imports: [FormsModule],
  templateUrl: './checkout.component.html',
  styleUrls: ['./checkout.component.css']
})
export class CheckoutComponent {
  private stripeService = inject(StripeService);

  public amount: number = 10.00;
  public description: string = 'Payment';
  public isLoading: boolean = false;
  public errorMessage: string = '';

  checkout(): void {
    if (!this.amount || this.amount <= 0) {
      this.errorMessage = 'Please enter a valid amount greater than 0';
      return;
    }

    this.isLoading = true;
    this.errorMessage = '';

    const origin = window.location.origin;

    this.stripeService.createCheckoutSession({
      amount: this.amount,
      description: this.description || 'Payment',
      successUrl: `${origin}/success?session_id={CHECKOUT_SESSION_ID}`,
      cancelUrl: `${origin}/cancel`
    }).subscribe({
      next: (response) => {
        if (response.url) {
          window.location.href = response.url;
        } else {
          this.errorMessage = 'Failed to create checkout session';
          this.isLoading = false;
        }
      },
      error: (error) => {
        console.error('Error creating checkout session:', error);
        this.errorMessage = error.error?.error || 'Failed to create checkout session. Please try again.';
        this.isLoading = false;
      }
    });
  }
}
API Documentation
POST /api/create-checkout-session
Creates a Stripe Checkout Session for payment processing.
Request Body:
{
  "amount": 10.00,
  "description": "Payment description",
  "successUrl": "http://localhost:4200/success?session_id={CHECKOUT_SESSION_ID}",
  "cancelUrl": "http://localhost:4200/cancel"
}
Response (Success):
{
  "sessionId": "cs_test_...",
  "url": "https://checkout.stripe.com/..."
}
Response (Error):
{
  "error": "Invalid amount"
}
Status Codes: – 200: Success – 400: Bad Request (invalid input) – 500: Internal Server Error
GET /api/health
Health check endpoint to verify server is running.
Starting the Express Server:
app.listen(port, () => console.log(`Listening on port ${port}!`));Response:
{
  "status": "ok"
}
Component Structure
Checkout Component
The checkout component handles payment form submission and redirects to Stripe:
Key Responsibilities: – Collect payment amount and description – Validate user input – Call Stripe service to create checkout session – Handle loading states and errors – Redirect to Stripe checkout page
Template Structure:
<form (ngSubmit)="checkout()">
  <input type="number" [(ngModel)]="amount" />
  <input type="text" [(ngModel)]="description" />
  <button type="submit">Pay with Stripe</button>
</form>
Success Component
Handles successful payment completion:
Key Responsibilities: – Display payment confirmation – Extract session ID from URL parameters – Provide navigation back to home
Success Component
Handles successful payment completion:
Key Responsibilities: – Display payment confirmation – Extract session ID from URL parameters – Provide navigation back to home
Cancel Component
Handles payment cancellation:
Key Responsibilities: – Display cancellation message – Provide option to retry payment
Related: You can also read about the Integration of stripe on demanding app and Integrating apple pay with stripe.
Testing
Manual Testing
Start the application:
npm start
Test Checkout Flow:
Navigate to http://localhost:4200
Enter an amount (e.g., 10.00)
Enter a description
Click “Pay with Stripe”
Use Stripe test card: 4242 4242 4242 4242
Use any future expiry date and any CVC
Test Success Page:
Complete a test payment
Verify redirect to success page
Check session ID is displayed
Test Cancel Flow:
Start a payment
Click cancel on Stripe checkout
Verify redirect to cancel page
Stripe Test Cards
Use these test card numbers for testing:
Success: 4242 4242 4242 4242
Decline: 4000 0000 0000 0002
3D Secure: 4000 0025 0000 3155
All test cards use: – Any future expiry date – Any 3-digit CVC – Any ZIP code
Troubleshooting
Common Issues
npm install2. “STRIPE_SECRET_KEY is undefined”
Solution: – Verify .env file exists in server/ directory – Check file content: STRIPE_SECRET_KEY=sk_test_… – Ensure no quotes around the value – Restart the server
3. “CORS Error”
Solution: – Verify backend is running on port 3000 – Check proxy.conf.json is configured – Ensure CORS is enabled in backend
4. “Payment session creation failed”
Solution: – Verify Stripe secret key is correct – Check Stripe dashboard for API errors – Ensure you’re using test keys in development
5. “Proxy error: ECONNREFUSED”
Solution: – Ensure backend server is running – Check backend is on port 3000 – Verify proxy.conf.json configuration
Debug Mode
Enable detailed logging:
Backend:
console.log(‘Request body:’, req.body);
console.log(‘Stripe key loaded:’, !!process.env.STRIPE_SECRET_KEY);
Frontend:
console.log(‘API URL:’, this.apiUrl);
console.log(‘Request:’, request);
Best Practices
Security
Never expose secret keys in frontend code
Use environment variables for all sensitive data
Validate input on both client and server
Use HTTPS in production
Keep dependencies updated
Code Quality
TypeScript: Use types for all variables
Error Handling: Always handle errors gracefully
Code Organization: Keep components focused and small
Comments: Remove unnecessary comments (keep code self-documenting)
Performance
Lazy Loading: Routes are already lazy-loaded
Bundle Size: Monitor with ng build –stats-json
Caching: Implement proper caching strategies
API Optimization: Minimize API calls and handle responses efficiently
Use Cases
1. E-commerce Platform
Scenario: Online store with variable product prices
Implementation: – Use amount from shopping cart total – Description: “Order #12345” – Custom success page with order details
2. Donation Website
Scenario: Charity accepting variable donations
Implementation: – Allow users to enter custom donation amount – Description: “Charity Donation” – Thank you message on success page
3. SaaS Subscription
Scenario: Monthly subscription with setup fee
Implementation: – Calculate total (subscription + setup) – Description: “Monthly Subscription + Setup” – Handle recurring payments (requires additional setup)
4. Service Booking
Scenario: Booking services with variable pricing
Implementation: – Calculate based on service type and duration – Description: “Service Booking – [Service Name]” – Include booking details in success page
Screenshots & Media
Checkout Page (Main Page)
Checkout Page Figure 1: Checkout page with payment form – User enters amount and description before proceeding to Stripe checkout

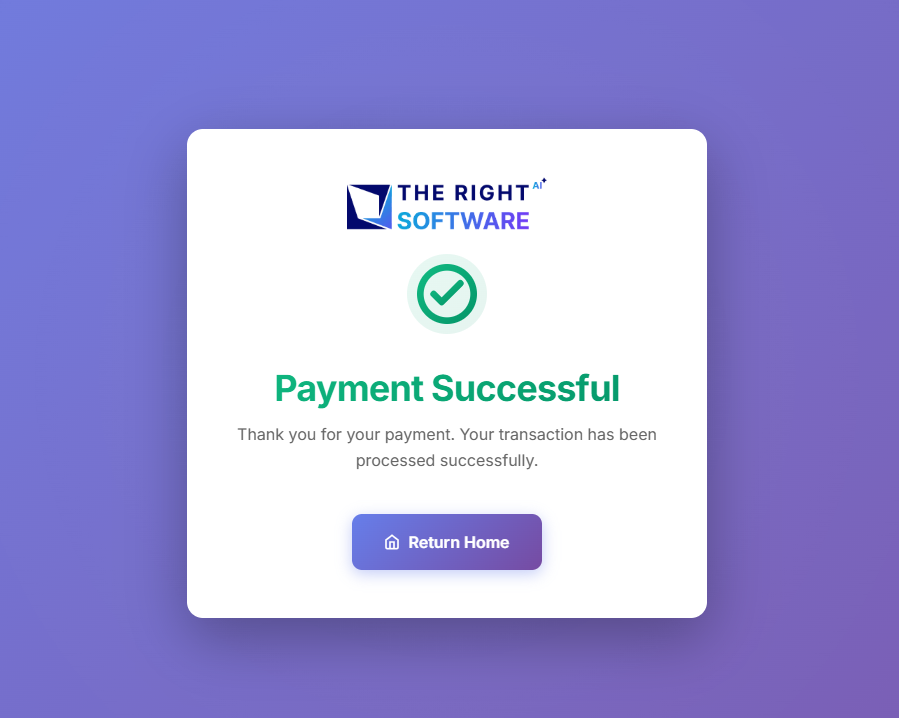
Success Page
Success Page Figure 2: Payment success confirmation page – Displayed after successful payment completion
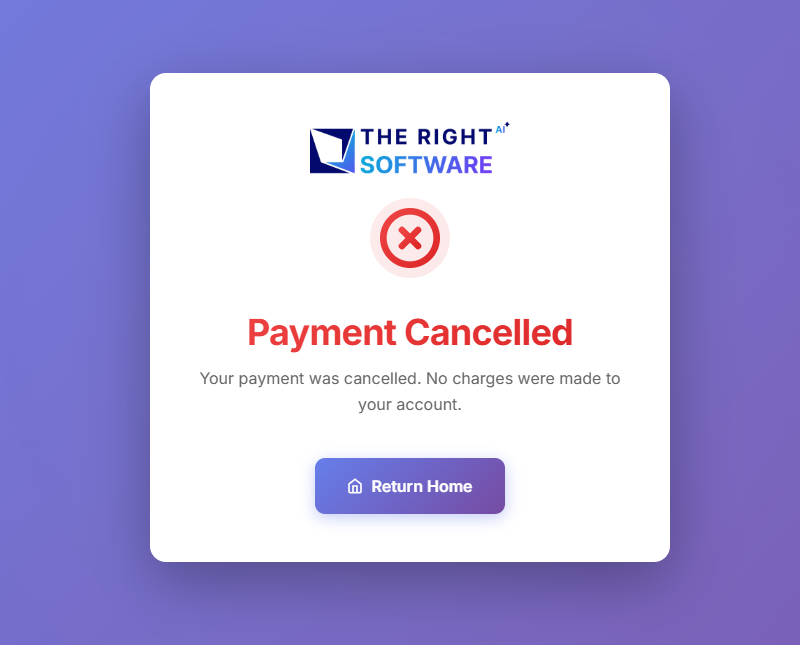
Cancel Page
Cancel Page Figure 3: Payment cancellation page – Displayed when user cancels the payment process
Demo Video
Video: Complete payment integration demonstration showing the full payment flow from checkout to completion
Conclusion
This guide has provided a comprehensive walkthrough of integrating Stripe payments into an Angular application. The implementation includes:
Full-stack TypeScript solution
Dynamic payment processing
Production-ready code
Comprehensive error handling
Complete Stripe integration
Resources
Stripe Documentation: https://stripe.com/docs
Angular Documentation: https://angular.io/docs
Stripe Dashboard: https://dashboard.stripe.com
Support: Contact Stripe support for payment-related issues
Appendix
a. Complete File Listings
Backend Server (server/index.ts)
[Full code listing – see implementation section]
Frontend Service (src/app/services/stripe.service.ts)
[Full code listing – see implementation section]
Checkout Component (src/app/pages/checkout/checkout.component.ts)
[Full code listing – see implementation section]
b. Environment Variables Reference
Variable | Description | Example |
STRIPE_SECRET_KEY | Stripe secret API key | sk_test_51… |
PORT | Backend server port | 3000 |
apiUrl | Backend API URL (frontend) |
c. API Response Codes
Code | Meaning | Description |
200 | OK | Request successful |
400 | Bad Request | Invalid input parameters |
500 | Internal Server Error | Server or Stripe API error |
d. Stripe API Limits
Test Mode: Unlimited test transactions
Rate Limits: 100 requests per second
Webhook Events: Real-time payment updates