Introduction
Change detection is a core concept in Angular, ensuring that the user interface stays in sync with the application’s state. Traditionally, Angular has relied on zones to handle change detection, where the framework automatically tracks asynchronous tasks and updates the view when necessary. But what if we could handle change detection more efficiently without zones? That’s where Zoneless Change Detection comes in.
What is Zoneless Change Detection?
Zoneless change detection is an advanced technique that allows Angular applications to bypass the traditional zone-based system for detecting changes. Normally, Angular uses zones to automatically detect changes when asynchronous tasks (such as promises, HTTP calls, or event listeners) are completed. The zone system ensures that after any asynchronous event, Angular runs change detection to update the view.
However, this automatic detection can sometimes introduce unnecessary overhead. Zoneless change detection removes this automatic behavior, giving developers full control over when and how change detection runs.
Why Use Zoneless Change Detection in Angular 18?
Performance Optimization:
By opting for zoneless change detection, you eliminate unnecessary change detection cycles that Angular might trigger on every asynchronous task.
Applications with complex UIs or real-time data handling can particularly benefit from this approach, reducing performance bottlenecks.
Control and Predictability:
Zoneless change detection gives developers more control over how and when the UI updates. This can be crucial in applications where only specific parts of the view need updating.
Reducing Application Overhead:
For applications with many asynchronous events, the zone system can trigger multiple unnecessary change detection cycles. Zoneless detection allows you to avoid this, leading to reduced memory consumption and better user experience.
Better resource management:
By limiting unnecessary change detection cycles, memory and CPU usage can be significantly reduced, especially in resource-constrained environments.
How Zoneless Change Detection Works
Angular’s default behavior for detecting changes relies on Zone.js, which wraps asynchronous operations and ensures that change detection is triggered when required. With zoneless change detection, you remove the reliance on Zone.js, allowing you to manually trigger change detection only when needed.
What We Do in This Article
1. Install Angular CLI: Install the latest version of Angular CLI.
2. Create Angular App: Generate a new Angular application.
3. Disable Zones: Disable Angular zones in the application.
4. Create Component: Develop a component and implement changes.
5. Understand Manual Change Detection: Learn about manual change detection techniques.
6. Add Async Events: Integrate async events to demonstrate zoneless change detection.
7. Test the App: Perform testing to ensure everything works as expected.
8. Handle Complex Scenarios: Address more complex scenarios, such as HTTP calls.
9. Build Digital Clock App: Create a digital clock application using zoneless change detection.
Let’s Build an Angular App with Zoneless Change Detection
In this section, we’ll go through how to create a simple Angular application and implement zoneless change detection. This step-by-step guide will walk you through setting up the project, disabling zones, and manually handling change detection.
Step 1: Create a New Angular App
To start, we need to set up a new Angular project. If you don’t have Angular CLI installed, you can install it by running:
npm install -g @angular/cli@latestNow, let’s create a new Angular app by running:
ng new angular-zoneless-appYou’ll be prompted to choose a few options, such as whether to include routing and what style format to use (CSS, SCSS, etc.). Feel free to choose what suits your project. For this guide, I’ll keep the defaults.
? Would you like to add Angular routing? (y/N) N
? Which stylesheet format would you like to use? (Use arrow keys) CSS
After that, navigate into your new app folder:
cd angular-zoneless-appNote: You must have Angular 18 inslalled for zoneless change detection.
Step 2: Disable Zones in the Angular App
By default, Angular uses Zone.js for change detection, but in this guide, we’ll disable it to demonstrate zoneless change detection.
First, open your main.ts file, located in the src folder, and modify it like this:
import { bootstrapApplication } from '@angular/platform-browser';
import { AppComponent } from './app/app.component';
import { enableProdMode, NgZone } from '@angular/core';
import { environment } from './environments/environment';

if (environment.production) {
  enableProdMode();
}

bootstrapApplication(AppComponent, {
  providers: [
    { provide: NgZone, useValue: 'noop' }  // Disable Zone.js
  ]
});
If you face any issues adding or running the above, you can undo the changes and add this in ‘app.config.ts’
import { ApplicationConfig, provideExperimentalZonelessChangeDetection, provideZoneChangeDetection } from '@angular/core';
import { provideRouter } from '@angular/router';
import { routes } from './app.routes';

export const appConfig: ApplicationConfig = {
  providers: [provideRouter(routes), provideExperimentalZonelessChangeDetection()]
};
In the code above, NgZone is provided as a noop (no-operation), which disables Zone.js in the Angular app. After this, Angular will no longer automatically detect changes. You’ll need to manually control when the UI updates.
Step 3: Create a Simple Component for Testing
Next, we’ll create a simple component where we can manually trigger change detection. For now, let’s modify the app.component.ts file to add a button that increments a counter:
import { Component, ChangeDetectorRef } from '@angular/core';

@Component({
  selector: 'app-root',
  standalone: true,
  imports: [RouterOutlet],
  template: `
    <h1>Zoneless Change Detection Example</h1>
    <p>Counter: {{ counter }}</p>
    <button (click)="incrementCounter()">Increment</button>
  `,
  styles: []
})
export class AppComponent {
  counter = 0;
  constructor(private cdr: ChangeDetectorRef) {}
  incrementCounter() {
    this.counter++;
    this.cdr.detectChanges();  // Manually trigger change detection
  }
}
In this component:
We’ve added a button that increments a counter when clicked.
After the counter is incremented, we call this.cdr.detectChanges(), which manually triggers Angular’s change detection to update the view.
Normally, Angular would automatically detect this change due to Zone.js. But since we’ve disabled zones, we have to manually tell Angular to update the UI.
Note: We have added styling and Google fonts, but you can add whichever ones you prefer.
Step 4: Understanding Manual Change Detection
By calling detectChanges(), we have full control over when the view is updated. Without this, even if the data (counter) changes, the UI won’t reflect the new value unless we explicitly trigger the change detection.
Here’s why this is beneficial:
Performance: By not running change detection on every asynchronous event, we reduce the overhead, especially in complex applications.
Precision: You can now control exactly when the UI updates, avoiding unnecessary re-renders.
Step 5: Add Asynchronous Events to Demonstrate Zoneless Change Detection
Let’s take it a step further by adding an asynchronous task, like setTimeout, and see how zoneless detection works in this scenario.
Update app.component.ts to include an asynchronous operation:
import { Component, ChangeDetectorRef } from '@angular/core';

@Component({
  selector: 'app-root',
  standalone: true,
  imports: [RouterOutlet],

  template: `
    <h1>Zoneless Change Detection Example</h1>
    <p>Counter: {{ counter }}</p>
    <button (click)="incrementCounter()">Increment</button>
    <button (click)="incrementAfterDelay()">Increment After 2 Seconds</button>
  `,
  styles: []
})
export class AppComponent {
  counter = 0;

  constructor(private cdr: ChangeDetectorRef) {}

  incrementCounter() {
    this.counter++;
    this.cdr.detectChanges();  // Manually trigger change detection
  }
  incrementAfterDelay() {
    setTimeout(() => {
      this.counter++;
      this.cdr.detectChanges();  // Manually trigger change detection after async task
    }, 2000);
  }
}
Here, we’ve added another button labeled “Increment After 2 Seconds.” When clicked, it triggers a setTimeout that waits for 2 seconds before incrementing the counter. Again, we call detectChanges() after the delay to update the view.
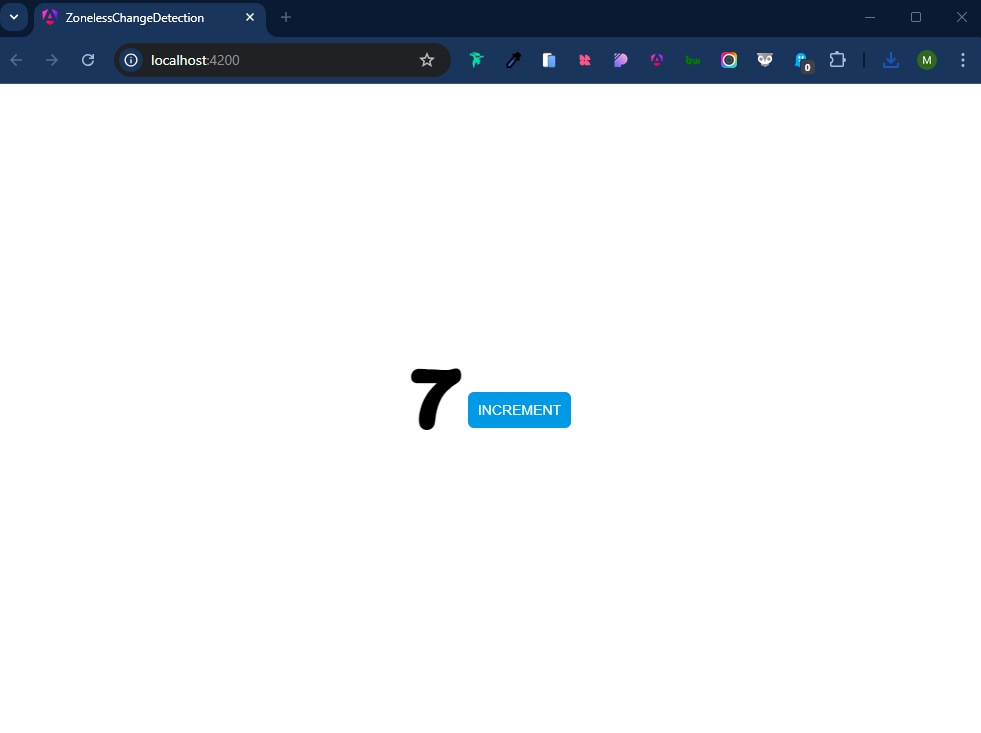
Step 6: Test the App
Now that we’ve set up zoneless change detection, let’s run the app to see it in action.
ng serve
Open your browser and navigate to http://localhost:4200. You should see the following features working as expected:
The counter increments immediately when you click the “Increment” button.
The counter increments after a 2-second delay when you click the “Increment After 2 Seconds” button.
In both cases, the UI updates only after we explicitly call detectChanges(). Without that manual call, even though the counter changes in the background, the view won’t update.
Step 7: Handling More Complex Scenarios
In real-world applications, you may deal with complex asynchronous operations like HTTP requests or observables. Zoneless change detection works similarly in these cases. Here’s an example using an HTTP call:
import { HttpClient } from '@angular/common/http';
import { Component, ChangeDetectorRef } from '@angular/core';

@Component({
  selector: 'app-root',
  standalone: true,
  imports: [RouterOutlet],
  template: `
    <h1>Zoneless Change Detection with HTTP</h1>
    <button (click)="fetchData()">Fetch Data</button>
    <p>{{ data }}</p>
  `,
  styles: []
})
export class AppComponent {
  data: string = '';

  constructor(private http: HttpClient, private cdr: ChangeDetectorRef) {}

  fetchData() {
    this.http.get('https://api.example.com/data').subscribe(response => {
      this.data = response.toString();
      this.cdr.detectChanges();  // Manually trigger change detection after HTTP call
    });
  }
}
In this scenario:
We fetch data from an API.
Once the data is retrieved, we manually trigger change detection to update the view.
Digital Clock App
Let’s build a simple digital clock app using Angular with zoneless change detection. The app will display the current time and update every second, but we’ll use manual change detection instead of relying on Angular’s default zone-based system.
Step 1: Create the Clock Component
We need to create a new component for our digital clock.
Run the following command to generate a new component:
ng generate component clock
This will create the necessary files for the clock component (clock.component.ts, clock.component.html, etc.).
Step 2: Implement Clock Functionality in TypeScript
In the clock.component.ts file, let’s add the logic to display and update the time manually.
import { Component, OnInit, ChangeDetectorRef } from '@angular/core';
@Component({
  selector: 'app-clock',
  templateUrl: './clock.component.html',
  styleUrls: ['./clock.component.css']
})
export class ClockComponent implements OnInit {
   hours: number | any = 0;
  minuts: number | any = 0;
  seconds: number | any = 0;
  format: string | any = '';
  constructor(private cdr: ChangeDetectorRef) { }
  ngOnInit(): void {
    setInterval(() => {
      let date = new Date();
      this.hours = date.getHours();
      this.minuts = date.getMinutes();
      this.seconds = date.getSeconds();
      this.format = this.hours >= 12 ? 'PM' : 'AM';
      this.hours = this.hours % 12;
      this.hours = this.hours ? this.hours : 12;
      this.cdr.detectChanges();
    }, 1000);
  }
}
Explanation:
We use setInterval to update the clock every second.
After updating the time, we call this.cdr.detectChanges() to manually trigger change detection and ensure the UI is updated.
Step 3: Add the Clock UI
Now that the logic is in place, let’s create the UI for the clock. Open the clock.component.html file and add the following code:
<main>
  <h1>
{{ hours }} : {{ minuts }} : {{ seconds}}<small>{{ format }}</small> </h1>
</main>
Let’s also style it to make the clock look nicer. Open clock.component.css and add the following styles:
main {
  display: flex;
  align-items: center;
  justify-content: center;
  width: 100%;
  height: 98vh;
}
h1 {
  font-size: 100px;
  font-weight: 800;
  font-family: "Pacifico", cursive;
  font-style: normal;
}
h1 small {
  font-size: 20px;
}
Step 6: Test the Application
Run the Angular app to see the digital clock in action:
ng serveOpen your browser and navigate to http://localhost:4200. You should see the clock displaying the current time and updating every second.
Zoneless Change Detection vs. Zone-Based Detection
Feature | Zone-Based Change Detection | Zoneless Change Detection |
Automatic UI Updates | Yes | No |
Performance Overhead | Higher | Lower |
Developer Control | Limited | Full control over updates |
Ease of Use | Simpler | Requires manual detection handling |
Challenges of Zoneless Change Detection
- Manual intervention: Without zones, developers need to manually trigger updates, which can introduce additional complexity.
Learning curve: For developers used to automatic change detection, switching to zoneless detection might require some adjustment.
Increased responsibility: With greater control comes more responsibility to ensure the UI stays in sync with the application state.
Conclusion
Implementing zoneless change detection in Angular 18 gives you more control over when your UI updates, which can improve performance and provide a more predictable flow in your application. While it requires a bit more manual work compared to the automatic detection provided by zones, the performance gains in larger or complex apps can be substantial. Now you’ve learned how to Disable Zone.js in your Angular app, Use ChangeDetectorRef to manually trigger change detection, Handle asynchronous operations like timeouts and HTTP calls in a zoneless environment.
Feel free to reach out if you need further assistance or if you’re looking to hire an Angular 18 developer for your project!