
Introduction
In today’s digital world, online payments are essential for various businesses. Whether it’s an e-commerce platform, a subscription service, or any other application, secure and seamless payment solutions are a must. Stripe is one of the leading payment gateways that developers can integrate into their applications to handle transactions efficiently. This article will guide you through integrating Stripe into an Ionic app step-by-step, explaining what Stripe is, why it’s beneficial, and how you can get started.
We will be using Ionic 8 and Stripe 6.2.1 in this article to ensure compatibility and demonstrate up-to-date methods of integrating Stripe into an Ionic application.
What is Stripe?
Stripe is a payment processing platform that enables businesses to accept payments online, through web/mobile apps, and in-person. It supports multiple payment methods such as credit cards, debit cards, bank transfers, and even digital wallets like Apple Pay and Google Pay. Stripe’s powerful API allows developers to seamlessly integrate payments into their applications while ensuring top-notch security and compliance with international regulations.
Why Use Stripe in Ionic?
Stripe is one of the best choices for handling payments in an Ionic application because it offers:
Security: Stripe is PCI-compliant, ensuring secure transactions.
Ease of Integration: Stripe provides easy-to-use APIs and libraries, simplifying the integration process.
Global Support: Stripe supports various currencies and payment methods, making it a suitable option for apps targeting global users.
Mobile-Optimized: Stripe is mobile-friendly and works well with Ionic, which is designed for building cross-platform mobile apps.
Developer-Friendly: Stripe’s API documentation is comprehensive, allowing developers to integrate quickly.
Customizable: You can easily customize payment forms and flows to fit your app’s design and functionality.
Rich Features: Features like subscription management, fraud prevention, and multi-currency support are built-in.
Seamless Integration: Stripe integrates well with other tools and services, making it ideal for apps built with frameworks like Ionic/Angular.
What We Will Do in This Article:
Create a New Ionic App: We start by setting up a new Ionic application.
Add Android Platform: Next, we build the app and add Android support.
Install Required Packages: We install all the necessary packages for our project.
Configure Packages: After installing the packages, we configure them for use.
Build Payment Form: We then create a payment form and add styling to it.
Update Component: In our component’s TypeScript file, we import necessary packages, create functions, and inject required services into the constructor.
Write Server-Side Code: We write the server-side code needed for the app.
Build and Sync App: After completing the setup, we build the Ionic app, sync it, and test it in the browser.
Update Android Files: Based on browser testing, we make changes to our Android files, such as updating the SDK version.
Final Testing: We then build, sync, and open the app in Android Studio to test it on a mobile device.
Prerequisites
Before you begin, ensure that you have the following installed and set up on your system:
Node.js: Make sure you have Node.js installed. You can download it from Node.js Official Website.
Ionic CLI: If you don’t have the Ionic CLI installed, run the following command to install it
npm install -g @ionic/cli- Capacitor: Ionic apps use Capacitor to integrate with native device features like payments
- Android Studio: You’ll need Android Studio to build and test the Android version of your app. You can download it from Android Studio Official Website.
- Stripe account: You’ll need a Stripe account to generate API keys for processing payments.
Related: You can also read about the Integration of stripe on demanding app and Integrating apple pay with stripe.
Let’s create a new Ionic/Angular App
If you don’t already have an Ionic project, you can create a new one by following these steps:
Open your terminal and run the following command to create a new Ionic app:
ionic start stripe-integration blank --type=angular2. Change the directory to your newly created app:
cd stripe-integration3. Add Capacitor support for Android:
ionic build
ionic cap add android
Let’s Integrate Stripe
Now that your app is ready, follow these steps to integrate Stripe:
Step 1: Install Stripe’s Package
In the terminal, run the following commands to install the required libraries:
npm install @capacitor-community/stripeStep 2: Set Up Stripe in Your App
In your app.component.ts, initialize Stripe with your publishable key:
import { Stripe } from '@capacitor-community/stripe';
import { environment } from 'src/environments/environment';

 constructor() {
    Stripe.initialize({
      publishableKey: environment.publishableKey,
    });
  }
Step 3: Create a Payment Form
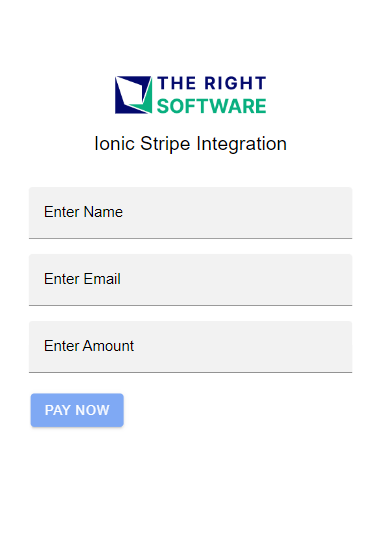
Create a simple payment form in your component’s HTML file:
<ion-content [fullscreen]="true">
  <div id="container">
    <ion-img src="https://therightsw.com/wp-content/uploads/2023/10/TRSLogo.png" class="ion-margin-bottom"></ion-img>
    <ion-label class="ion-text-center">Ionic Stripe Integration</ion-label>
    <ion-list lines="none" class="ion-padding ion-margin-top">
      <ion-item lines="none" class="ion-margin-bottom">
        <ion-input type="text" label="Enter Name" labelPlacement="floating" fill="solid" placeholder="Enter Name"
          [(ngModel)]="name"></ion-input>
      </ion-item>
      <ion-item lines="none" class="ion-margin-bottom">
        <ion-input type="email" label="Enter Email" labelPlacement="floating" fill="solid" placeholder="Enter Email"
          [(ngModel)]="email"></ion-input>
      </ion-item>
      <ion-item lines="none" class="ion-margin-bottom">
        <ion-input type="number" label="Enter Amount" labelPlacement="floating" fill="solid" placeholder="Enter Amount"
          [(ngModel)]="amount"></ion-input>
      </ion-item>
      <ion-item class="button">
        <ion-button size="medium" [disabled]="!name || !email || !amount" (click)="paymentSheet()">Pay Now</ion-button>
      </ion-item>
    </ion-list>
  </div>
</ion-content>
Step 4: Add some styling in your Component
#container {
  text-align: center;
  position: absolute;
  left: 0;
  right: 0;
  top: 50%;
  transform: translateY(-50%);
}
#container ion-img {
  height: 40px;
}
#container ion-toolbar {
  display: flex;
  justify-content: center;
  align-items: center;
  flex-direction: column;
}
#container ion-label {
  font-size: 1.3rem;
  margin-top: 50px;
}
Step 5: Handle Payment in Your Component
In your component’s TypeScript file, implement the payment logic:
First import `HttpClient` in the payment-component.ts file
import { HttpClient } from '@angular/common/http';Then import `Stripe` and `aymentSheetEventsEnum`
import { Stripe, PaymentSheetEventsEnum} from '@capacitor-community/stripe';- Then import `first` and `lastValueFrom`
import { first, lastValueFrom } from 'rxjs';And last one is `environment`
import { environment } from 'src/environments/environment';- Declare some variables which we use for binding form data:
  name!: string;
  email!: string;
  amount!: number;
  data: any = {};
Inject HttpClient in constructor:
constructor(private http: HttpClient) {}Finally payment function:
async paymentSheet() {
    try {
      if (!this.name || !this.email || !this.amount) {
        return
      }
      this.data = {
        name: this.name,
        email: this.email,
        amount: this.amount * 100,
        currency: 'usd',
      }
      // be able to get event of PaymentSheet
      Stripe.addListener(PaymentSheetEventsEnum.Completed, () => {
        console.log('PaymentSheetEventsEnum.Completed');
      });

      // Connect to your backend endpoint, and get every key.
      const data$ = await this.httpPost(this.data);
      const { paymentIntent, customer, ephemeralKey } = await lastValueFrom(data$);
      // prepare PaymentSheet with CreatePaymentSheetOption.
      await Stripe.createPaymentSheet({
        paymentIntentClientSecret: paymentIntent,
        customerId: customer,
        customerEphemeralKeySecret: ephemeralKey,
        merchantDisplayName: "Trs"
      });

      // present PaymentSheet and get result.
      const result = await Stripe.presentPaymentSheet();
      console.log(result);
      if (result.paymentResult === PaymentSheetEventsEnum.Completed) {
        // Happy path
      }
    } catch (error) {
      console.log(error);
    }
  }
And the last one is an http function
 httpPost(body: any) {
    return this.http.post<any>(environment.api + 'payment-sheet', body).pipe(first());
  }
All the pieces aligned:
import { Component } from '@angular/core';
import { HttpClient } from '@angular/common/http';
import { Stripe, PaymentSheetEventsEnum } from '@capacitor-community/stripe';
import { first, lastValueFrom } from 'rxjs';
import { environment } from 'src/environments/environment';

@Component({
  selector: 'app-home',
  templateUrl: 'home.page.html',
  styleUrls: ['home.page.scss'],
})
export class HomePage {
  name!: string;
  email!: string;
  amount!: number;
  data: any = {};

  constructor(private http: HttpClient) { }

  async paymentSheet() {
    try {
      if (!this.name || !this.email || !this.amount) {
        return
      }
      this.data = {
        name: this.name,
        email: this.email,
        amount: this.amount * 100,
        currency: 'usd',
      }
      // be able to get event of PaymentSheet
      Stripe.addListener(PaymentSheetEventsEnum.Completed, () => {
        console.log('PaymentSheetEventsEnum.Completed');
      });

      // Connect to your backend endpoint, and get every key.
      const data$ = await this.httpPost(this.data);
      const { paymentIntent, customer, ephemeralKey } = await lastValueFrom(data$);
      // prepare PaymentSheet with CreatePaymentSheetOption.
      await Stripe.createPaymentSheet({
        paymentIntentClientSecret: paymentIntent,
        customerId: customer,
        customerEphemeralKeySecret: ephemeralKey,
        merchantDisplayName: "Trs"
      });

      // present PaymentSheet and get result.
      const result = await Stripe.presentPaymentSheet();
      console.log(result);
      if (result.paymentResult === PaymentSheetEventsEnum.Completed) {
        // Happy path
      }
    } catch (error) {
      console.log(error);
    }
  }

  httpPost(body: any) {
    return this.http.post<any>(environment.api + 'payment-sheet', body).pipe(first());
  }

}
Step 6: Before moving ahead, Some Configurations:
Open the main.ts file, then import and configure defineCustomElements.
import { defineCustomElements } from 'stripe-pwa-elements/loader';
platformBrowserDynamic().bootstrapModule(AppModule)
  .then(() => defineCustomElements(window))
  .catch(err => console.log(err));
Step 7: Create a Node.js Express Backend
require('dotenv').config();
const stripe = require('stripe')(process.env.STRIPE_SECRET_KEY);
const express = require('express');
const cors = require("cors");
const app = express();
const bodyParser = require('body-parser');
app.use(express.static('public'));
app.use(express.json());
app.use(cors());
app.use(bodyParser.json());
// const host = '192.168.1.117'; //system ip addr
const host = '192.168.1.119'; //system ip addr
app.post('/payment-sheet', async (req, res) => {
try {
const data = req.body;
console.log(req.body);
const params = {
name: data.name,
email: data.email
};
const customer = await stripe.customers.create(params);
console.log(customer.id);
const ephemeralKey = await stripe.ephemeralKeys.create(
{ customer: customer.id },
{ apiVersion: '2022-08-01' }
);
const paymentIntent = await stripe.paymentIntents.create({
amount: data.amount,
currency: data.currency,
customer: customer.id,
automatic_payment_methods: {
enabled: true
}
});
const response = {
paymentIntent: paymentIntent.client_secret,
ephemeralKey: ephemeralKey.secret,
customer: customer.id
}
res.status(200).send(response);
} catch (error) {
console.log(error)
}
})
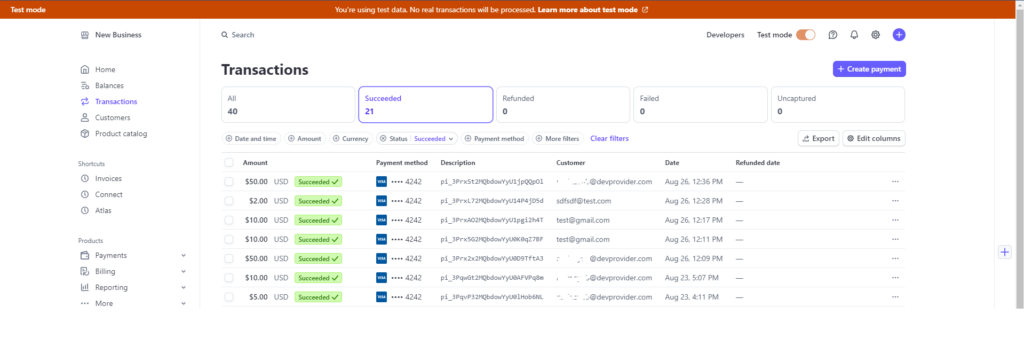
app.listen(7000, host, () => console.log('Running on port 7000'));Step 8: Serve app and Test in browser
Start Ionic Server
Ionic serveStart Node Express Server
node server.js- Final Result
Note: We have added the payment conformation alert and page; you can add them as per your requirement.
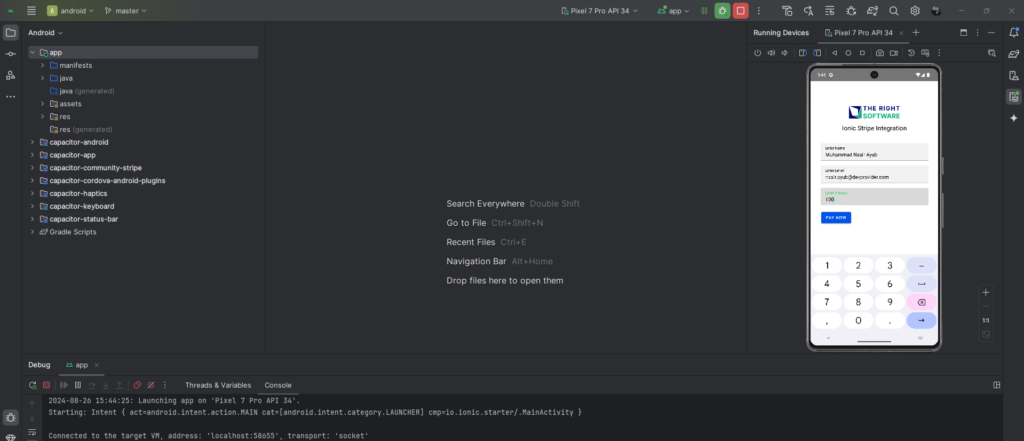
How to Build and Test Your App on Android Studio?
Step 1: Update SDK version
Go to the android/variables.gradle file and set minSdkVersion to 26 and compileSdkVersion to 34.
Step 2: Build the Ionic App
Once you have finished integrating Stripe, you can build your Ionic app for Android using the following command:
ionic buildStep 2: Sync the Project with Android
After building the app, sync the project with Android using Capacitor:
ionic cap syncStep 3: Open in Android Studio
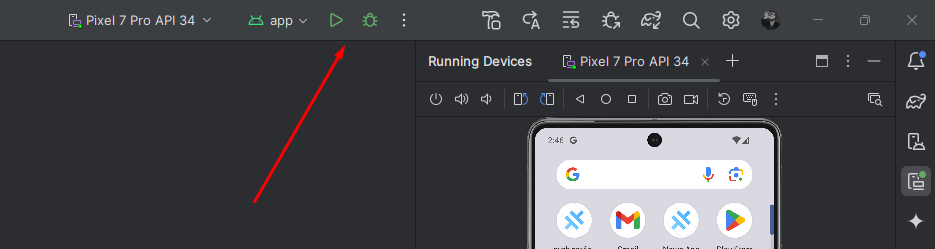
Now, open the Android project in Android Studio by running:
ionic cap open androidStep 4: Run/Debug App
When Android Studio opens, go to the top right corner and click on the Start/Debug button of your choice, and your app will appear on the selected device.
Use Cases of Stripe with Examples
E-Commerce: Integrating Stripe allows for seamless payment processing in an e-commerce mobile app.
Subscription Services: Apps like streaming platforms or SaaS products can use Stripe to manage recurring payments.
Donation Platforms: Non-profit organizations’ apps can integrate Stripe to collect donations easily and securely.
Related: You can also read about the Integrate Stripe Payments with Angular 18.
Conclusion
Integrating Stripe into an Ionic app provides a reliable and secure solution for handling online payments. With its ease of use, global support, and powerful features, Stripe is a great choice for mobile app developers. Following the steps outlined above, you can set up Stripe in your app, test it on Android, and start accepting payments efficiently.
If you need assistance with your Stripe and Angular integration, or want to discuss with Ionic 8 Experts at The Right Software. We’re always here to help you deliver the best possible solutions for your business.